Home Reviews

Building Industry Trips Over Fall Safety Requirements

roof safety for workersOSHA (Occupational Safety and Health Administration) rule 1926.501 states that any work performed at a height of 6’ or more above a lower level shall have proper protections that safeguard workers from fall injuries. Note that the rule is not just describing roofs. This can also mean walking surfaces, trenches, pits, retaining walls or any place with an edge that drops 6’ or more to another level. The law calls out the requirements and obligates employers to identify needs and provide these protections to ensure roof safety for workers.

Acceptable fall protection can be provided using any of the following three methods:

  1. Guardrails
  2. Fall Arrest Harnesses
  3. Safety Nets

roof safety for workersGuardrails and/or safety nets are good protection options during initial construction, but these devices are too cumbersome and expensive for general maintenance and repairs. For post-construction applications fall arrest systems are the way to go. What this means is that anyone working without a ladder on any part of a home over 6’ above the ground, (such as the roof) may not do so unless they are trained and provided with harness fall arrest equipment.

Harness systems are designed to arrest falls in progress, but they do not actually prevent them from happening. It is a safety mechanism of last resort, like an air bag in a car or climbing a mountain with a rope. The system includes a body harness that is worn by the worker, a connection lanyard with clip, and a firmly attached anchor point on the roof to secure the lanyard to. The system is designed with lanyards to be long enough to allow some free movement, but short enough to prevent the wearer from either free falling more than 6’ or from hitting the ground should a fall occur.

roof safety for workers

PFAS Personal Fall Arrest System

Initially, fall arrest harness systems feel a bit cumbersome, but with repeated use they become manageable and comfortable and just another part of the job. Like a tool belt. On low sloped or flat roofs some workers complain that the lanyard tends to get in the way and can perhaps become a trip hazard on its own. This complaint is quickly offset on steep or slippery surfaces where the system provides an obvious improved margin of safety plus elevated confidence to the wearer that can in fact increase work speed and quality.

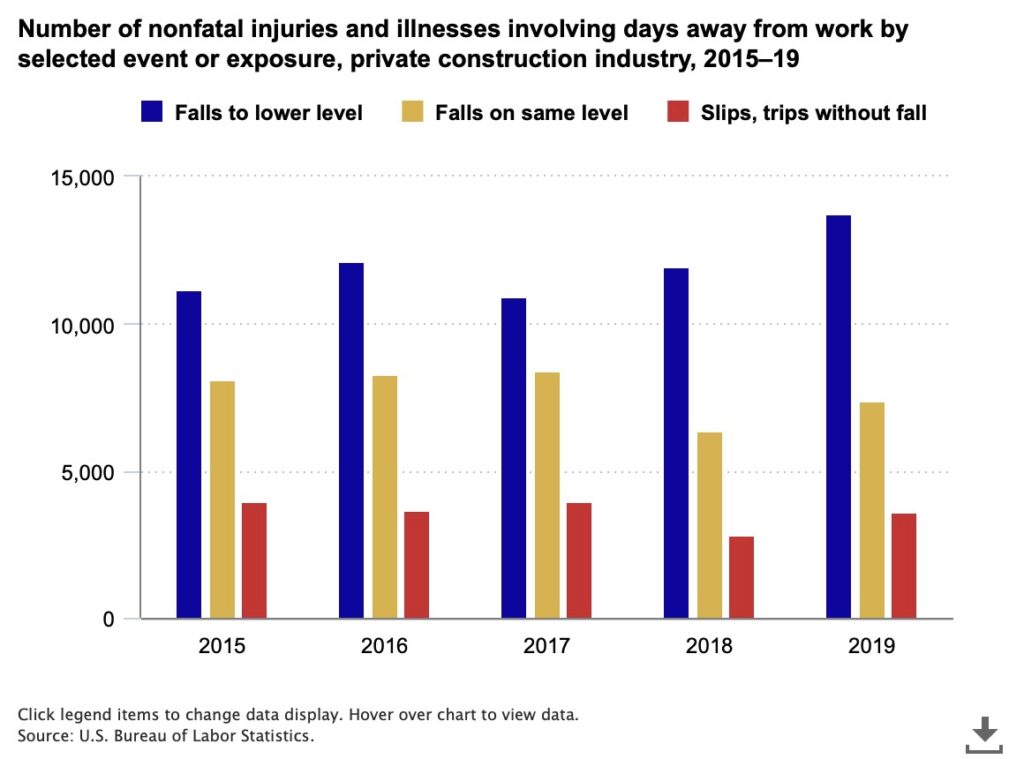
Fall accident statistics

OSHA’s requirement for fall protection has been law since 1994 and considering the stats listed above, it no doubt has the potential to save both injuries and lives.
roof safety for workers

So why isn’t it embraced?

Every home in America falls under the OSHA rule, yet have you ever seen a residential roofer using the system. I have inspected thousands of homes over my career and not one has been equipped with the roof anchors that are needed to use the harness system. Every home needs to have the roof maintained occasionally so why is this the case? Why has the building industry been so slow to make this lifesaving law a mandatory part of everyday use?

At the time of this article, few if any building departments have enacted requirements for installation of the roof anchorages needed for fall protection. This would be an easy “mark-up stamp” requirement on permits for repairs, reroofs or new construction, like what was done to encourage use of smoke detectors. It seems logical to me that if a federal law requires the use of safety harnesses when working on roofs, then all structures should be constructed with the anchors needed for them.
RELATED POST

Wood Roof Treatments-Yes or No?

Can these “miracle” treatments extend the life of wood shingle or shake roofs? The answer might surprise you.
Read More…

In California, the use of fall protection systems is almost non-existent. Residential contractors, roofers and handymen all seem blissfully ignorant of the law. Perhaps this is because the building departments are not currently requiring it and OSHA doesn’t seem to be enforcing it. Fines are substantial and can range from $13,653/each for the first serious violations up to $136,530/each for repeat violations.

Hint for contractors and roofers

It’s time to lead the way by adding fall protection safeguards to your business plan. Provide a safer place to work for your employees and save yourself some money in fines before the feds catch on.

Hint for homebuilders and developers

Home builders and developers are missing out on a golden opportunity to differentiate themselves. How enlightened would it be to advertise that your offerings come with built-in features that make the property easier and safer to maintain? Roof safety for workers can be a great marketing tool.

Summary: Roof safety for workers

FALLS ARE THE LEADING CAUSE OF DEATH IN CONSTRUCTION.
In 2020, there were 351 fatal falls to a lower level out of 1,008 construction fatalities (BLS data). These deaths represent 35% of all construction fatalities and are preventable.

Since 2012, OSHA has partnered with the National Institute for Occupational Safety and Health and National Occupational Research Agenda (NORA) – Construction Sector on the Fall Prevention Campaign to raise awareness among workers and employers about common fall hazards in construction, and how falls from ladders, scaffolds and roofs can be prevented.

Employers must PLAN to get the job done safely
When working from heights, employers are required to plan projects to ensure work safety for workers. Begin by deciding how the job will be done, what tasks will be involved, and what safety equipment may be needed to complete each task.

SOLUTIONS

Caring for Cedar Shingle and Shake Roofing

If you are lucky enough to own a wood roof, congratulations! Now pay it back by taking good care of it.
Read More…

When estimating the cost of a job, employers should include safety equipment, and plan to have all the necessary gear and tools available at the construction site. For example, on a roofing project, think about the different potential fall hazards, such as holes or skylights and around any edges, then plan and select fall protection suitable to that work, such as personal fall arrest systems (PFAS) to provide roof safety for workers.

PROVIDE the right equipment
Workers who are six feet or more above lower levels are at risk for serious injury or death if they should fall. To protect these workers, employers must provide fall protection and the right equipment for the job, including the right kinds of ladders, scaffolds, and other safety gear.

Use the right ladder, scaffolding or other accessories to get the job done safely. For roof work, if workers use personal fall arrest systems (PFAS), provide a harness for each worker who needs to tie off to the anchor. Make sure the PFAS fits, and regularly inspect it for safe use.

TRAIN everyone to use the equipment safely
Every worker must be trained on proper set-up and safe use of any equipment they use on the job. Employers must train workers to recognize and avoid hazards on the job. See educational materials and resources page for posters, factsheets, and other training materials.

Learn How Many Trees it Takes to Build a House?

There are many good reasons to take care of your home and saving trees is one of them. You would be surprised at how many trees it takes to build a house. Good maintenance helps protect the environmental investment that is made in your home. Sustainability folks refer to this as the embedded environmental footprint of the home. This footprint signifies that in addition to the monetary cost of your home, constructing it extracted a toll on the environment and removed value from our future natural resource bank account. Learn how much timber and future homes were lost in last years fires.

How many trees to build a home?
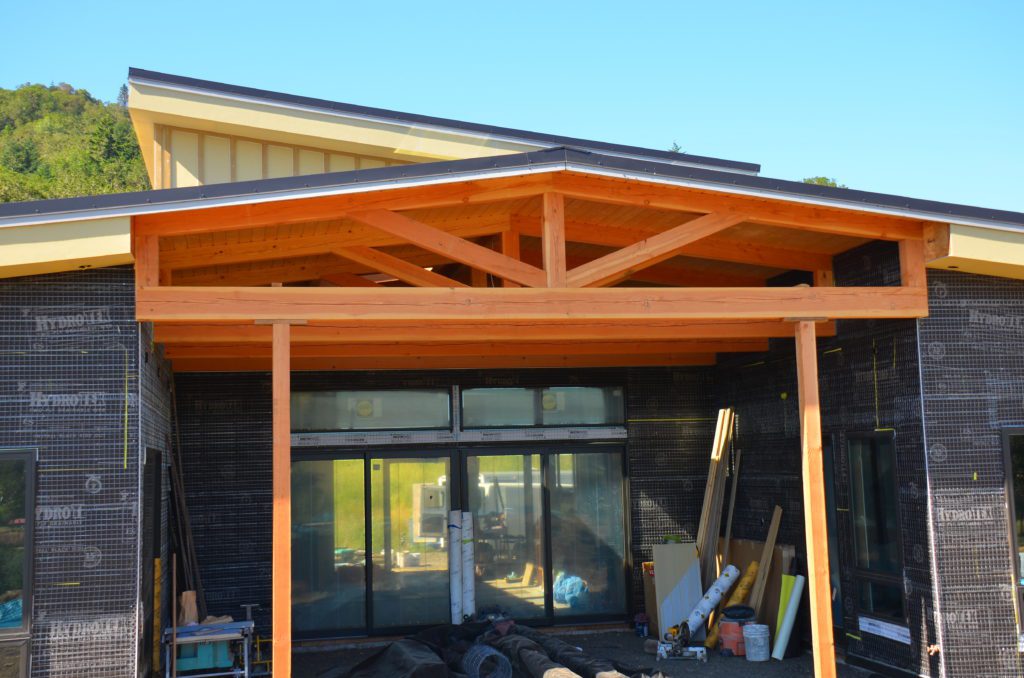
Big timber trusses from second growth forests

Land had to be cleared, prepared and dedicated to a house rather than the natural environment. Materials had to be mined and manufactured into useable components all of which took labor and energy to produce. The making of concrete, glass, petroleum, metals, plastics, fiberglass, paint, asphalt, appliances and wood products all extract costs on the environment and many of these are non-renewable. Let’s take a deeper look at just one example of the environmental costs to build an average home. The number of trees that went into its construction.

RELATED POST

How Many Parts Needed For A House

There are many, many parts needed for a house and a lot of time, money and energy is expended. The carbon footprint for building a home from scratch is large.
Read More…

How many trees to build a home?
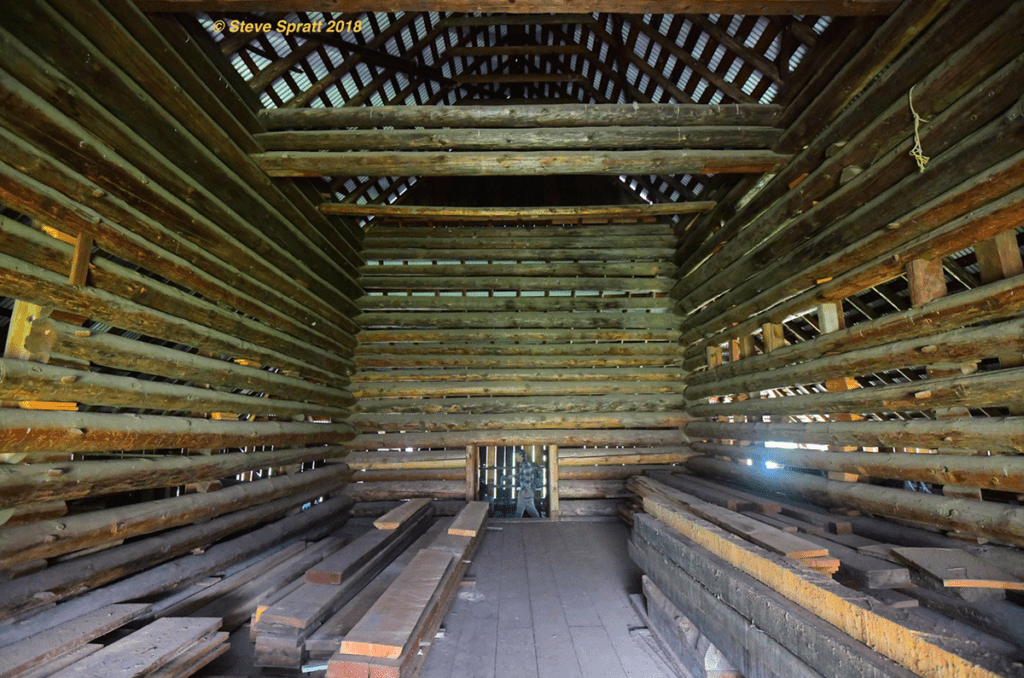
Old log barn from 1800’s in Yosemite National Park

You can save trees by taking care of your home.

Today lumber comes in pre-cut, ready to use pieces of wood that no longer resemble the trees from which they came. But that wasn’t always the case. Houses were originally built by hearty folks who had to actually harvest the trees themselves. Many log homes were built with minimal sawn lumber because cutting trees down, then sawing them up was hard and expensive. Knowing how many and of what size to cut was important. It is way too easy today to forget that lots of trees are needed to build our modern homes.

RELATED POST

Preserving and Protecting Exposed Wood Beams

To extend their useful lives and preserve that premium value, big beams exposed to the weather need special help.
Read More…

Board footage

Learning about board footage is a simple forestry exercise. We can use it to determine the number of trees needed for the lumber to build our home.

The amount of wood in a tree is referred to as board footage. A board foot is 1”x12”x12”. Since there are 12 board feet in every cubic foot, you just need to determine the volume of a tree to understand its useful wood yield. Since most lumber comes from cylindrical shaped, coniferous trees, you can do this by measuring the height of the tree and multiplying by its average cross-sectional area.

How many trees to build a home?
Old growth trees

The height of a tree can be calculated very accurately from the ground by using a tape measure and basic trigonometry (yes, you finally get to use some high school math,) or more roughly by measuring shadows. Learning how to do this is a fun exercise and videos and descriptions can be readily found online. For our purposes we will simply use the average height of currently harvested trees which is eighty feet.

Next we need to determine the diameter of the tree. Foresters use a standard place to measure diameter at chest height, or about 4.5 feet above the ground. This following may sound complex but it is not.

Calculations

Using a tape measure and the formula Diameter=Circumference/3.14 you can calculate the area of the diameter of the tree. You’ll need to divide the diameter by 2 to get the radius for the rest of the calculations, and you’ll want to divide this radius by 12 to put it in feet rather than inches! From this area we can figure out cubic feet using Cubic Feet=(Area x Height)/4, where 4 is used to account for the taper of the tree from the base to the top. With this volume known, all you have to do is multiply it by 12 to get board feet!

Now that we know how to figure out the amount of wood per tree, we just need to know how much wood we will need to understand how many trees we will need to cut down.

Mature Trees Needed Per Home

The precise amount of lumber required to build a wood-framed house varies slightly across the nation, but a good average would be 6.3 board feet for the structural framing materials in every square foot of house. According to the Census Bureau, the average American home built in 2013 was 2,600 square feet, meaning it would have required 16,380 board feet of lumber to build!

Homeowners should know the trees needed to build a home
An ancient, old-growth log. I lost count of the rings at 825. It started growing about the time the Magna Carta was signed.

So how many trees does it take to build a house? For the sake of discussion, consider an average mature fir or pine tree with a height of 80’ and a diameter of 2’. Using the calculation detailed above, you will find that its lumber yield is about 754 board feet. And if you require 16,380 board feet to frame the average home, almost 22 mature firs will be needed.

Another 22-24 trees will be needed for the rest of the house and its finishes. Hardwood floors, cabinets, siding, roofing, paneling etc. could more than double the number of trees needed to complete the home. In total, building a home today will consume forty-four mature trees for every 2600 square feet. Be sure to include the garage when adding up your square footage.

Trees take time to grow

The problem with trees is it takes a long time to make one. To put the environmental value into perspective, each 80’ tall fir tree takes about 6 decades to grow to that size. Forty-four of these beautiful trees represents 2,640 tree/years of growth. All this for just a single average American home. To be available today, these trees must have begun growing just after World War II.

The sacrifice of trees is a big environmental investment in your home. Especially when they are used to make in a structure that perhaps through a combination of fickleness, change of fashion and poor care may only last 50 years. From a tree’s perspective every year a structure can be extended, counts–times 44!

Trees in history

In addition to habitat, trees furnish essential requirements like clean water, food and oxygen. As humans evolved and migrated around the globe, trees also provided additional necessities such as energy, shelter, medicine, tools and transportation in the form of wheels and ships. A primary motivation to explore the new world was to find more trees as they had become scarce on the European continent. Running out of trees, as happened on Easter Island can be devastating and have irreversible consequences.

Trees and climate

Trees contribute directly to the environment by providing oxygen, improving air quality, climate amelioration, conserving water, preserving soil, and supporting wildlife. During the process of photosynthesis, trees take in carbon dioxide and produce the oxygen we breathe.

Trees help to control climate by moderating the effects of the sun, rain and wind. Leaves absorb and filter the sun’s radiant energy, keeping things cool in summer. Trees also preserve warmth by providing a screen from harsh wind. In addition to influencing wind speed and direction, they shield us from the downfall of rain, sleet and hail. Trees also lower the air temperature and reduce the heat intensity of the greenhouse effect by maintaining low levels of carbon dioxide.

According to the U.S. Department of Agriculture, “One acre of forest absorbs six tons of carbon dioxide and puts out four tons of oxygen. This is enough to meet the annual needs of 18 people.” Trees, shrubs and turf also filter air by removing dust and absorbing other pollutants like carbon monoxide, sulfur dioxide and nitrogen dioxide. After trees intercept unhealthy particles, rain washes them to the ground.

RELATED POST

Construct your wood deck to last a lifetime.

If you are going to take the time and expense to build a wood deck, why not do it right? Here are some tips for highly durable deck building.
Read More…

Summary: Trees are high value asset

Catastrophic fires impact the availability of lumber for 200-300 years to come.

It took at least sixty years to grow each of the forty four trees needed for your average home today. Post-harvest replanting continues to increase and the industry is very conscious of sustainability of the yield. Still, trees are slow to grow and replace themselves. Combined with slow replacement, the destruction of thousands of forest acres that now burn up every summer lead me to wonder how many will be left for tomorrow’s homes? Check out how many homes could be built with the timber we recently lost.

The value of our forests are truly priceless. They are worth managing properly and protecting. Homeowners can help by making sure their home is well-maintained. As an example, the average wood deck will only last 10-15 years. Is it worth it to harvest 100 year old redwood trees to make a deck that will only last 15 years? With good design, construction methods and maintenance that deck could easily last 30 years. That is double or triple the life of an unmaintained deck and makes the calculation much more sustainable. Still, trading a 100 year old tree for a deck that only lasts 30 years still appears to me to be a poor trade.

Bottom line:

It takes more than 20 full-grown Douglas Fir trees to build every 1,000 square feet of structure. To find out how many trees would it take to build your house, go to Zillow.com, enter your address and add the square footage, (plus any garage footage) for the total. Then divide the total square footage by 120.33 to arrive at the number of trees needed for your home. Then multiply the total number of trees by 60 to find out the number of tree years it took to grow all those trees. You will be shocked?

So make sure you build your home to last, then maintain it properly. Even incremental improvements in durability can affect a big difference in sustainability. Make the most out of the trees we use… and the trees we have left. If you need help with improving your maintenance program, you can read more here at www.homepreservationmanual.com or contact the folks at HPS Palo Alto Inc. They can answer questions and point you in the right direction!


Why attic fans don’t work well and what to do instead!

With the summer season upon us, now is a good time to review an uncomfortable topic. Hot attics, and why traditional attic fans don’t work well enough to cool them off! Continue reading to learn why…or just skip ahead to learn how to cool them off here.

A very hot problem

Last week we had some warm weather for the first time this year. One of our clients called to say that their second floor was extremely hot and requested we install a larger and more powerful attic fan. The client had decided a new fan was needed to replace a solar unit they had installed several years ago. The solar fan  “didn’t seem to be working as it should.” Compared to the rest of the house, the second-floor rooms were extremely hot and impossible to live in during the afternoon and evening.

Attic construction

Why attic exhaust fans do not work
Attic exhaust fan

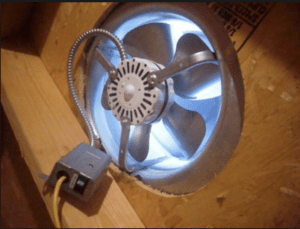
On inspection, I found the villain in the attic exactly as the customer described.  A single, roof mounted, solar powered attic exhaust fan. It was working.

There was no other ducting or HVAC equipment in the attic. Insulation was a 6”-8” layer of blown-in fiberglass on the top of the ceiling, plus random pieces of R-19 fiberglass batts tossed askew atop the blown-in material, but not fully covering the space.

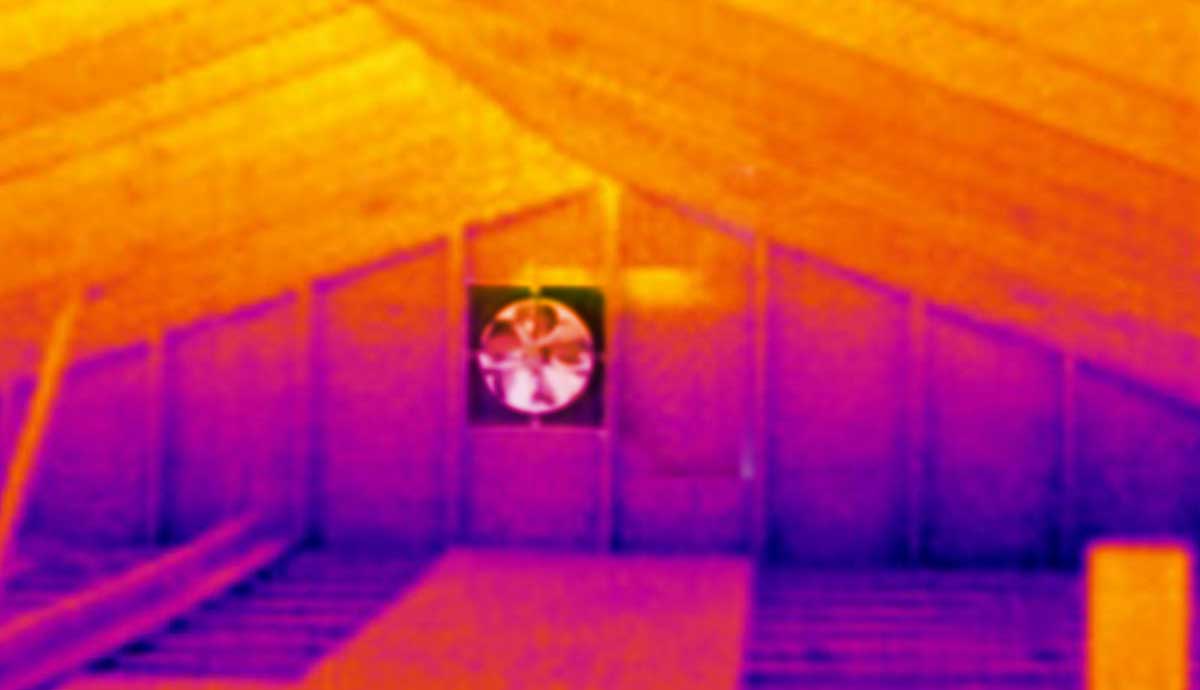
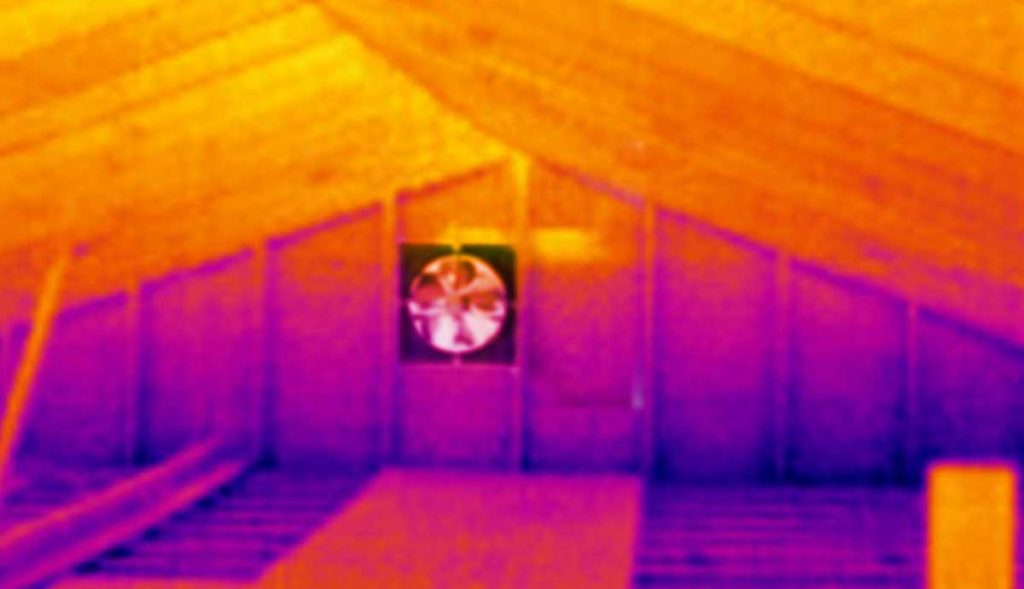
The 2×6 roof rafters with 4” skip sheathing, and ½” plywood shear was all fully exposed to view. 6”x24” eave vents were installed around the perimeter every 8’ and vents were clear and unblocked by the insulation. The temperature of the roof sheathing inside the attic was 147 degrees. The 45’x24’ (approx. 4500 cubic foot) attic space was very hot.

I explained to our client that the idea of attic fans to remove hot air from the attic area might seem logical. But they actually might need a bigger and better solution

Anatomy of attic heat

Imagine yourself laying in the sun on a beach in Cancun. All is good for about 5 minutes then you start to feel hot. You go and get a big fan and set it up to blow air over you. Ah, feels better for about another 5 minutes. Soon even the blowing air feels hot, so you exchange the fan for an air conditioner and let that blow cold air on you. Feels great now so you stay out in the sun till you notice that your skin is red and blistered and burned to a crisp.

What happened? You got zapped by UV rays, a form of invisible radiant heat! It’s why you can still get a terrible sunburn even on a cold or cloudy day. Radiant heat zips right through cold air without any affect and cooks your skin. So, what does that have to do with your house?

Attic exhaust fans
Radiant heat transfer

The roof structure of your home is like your skin. Radiation from the sun heats the surface of the roof. From there, the entire mass of the roof (roofing, roof paper, nails, sheathing, rafters) warms up through conduction. Soon the roof’s structural mass is so hot that it will radiate heat on its own (like the sun). This radiant heat passes down through the attic space and hits the material on the surface of the ceiling structure (insulation, wood joists, drywall, ducting etc.). Very quickly the entire mass of the ceiling structure also becomes a giant heat radiator. This heat moves back up towards the roof again and will continue to radiate heat well after the sun goes down. If your ceiling is not sealed airtight and extremely well-insulated, much of this heat is going to radiate downward into your home too.

Hot air

Air in the attic that comes in contact with the surfaces of the hot framing, will become heated through conduction. This creates a kind of hot air sandwich formed between the roof and ceiling structures. The warming of all these surfaces is why the attic interior gets so much hotter than the exterior temperature.

RELATED POST

Thermal imaging cameras

Help diagnose hard-to-find heat-loss areas, and pinpoint water leaks behind walls with new Thermal imaging cameras.
Read More…

Ventilation

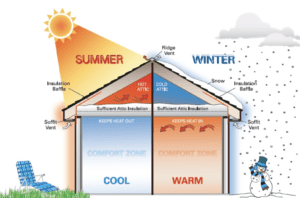
Trapped air and heat in the attic would cause problems for some roofing materials. It could also cause  condensation leading to mold issues. This is why attic spaces are required to have ventilation built into the structure. Air openings are placed along the lower eave areas and the upper roof ridge or gable end. These openings allow fresher and cooler outside air to circulate naturally via convection up from the eaves and out at the gable or ridge vents.

Mechanical attic fans

This is where an attic fan can help. A mechanical fan working in an attic space equipped with adequate ventilation openings can move hot air out and increase the flow of air through the attic. This will indeed help reduce the temperature in the attic, but only marginally unless the incoming air from outside is substantially colder (not likely in the summer till nightfall) You also need to exchange the air quickly. For instance, if the attic is 150 degrees and you circulate air through it that is coming in at 110 degrees from the outside, then you can expect that the cooling effect may bring the attic temperature down to perhaps 125-130 degrees. The faster the air changes, the closer you can get to the incoming air temperature. But you cannot get lower than 110. There are formulas for this that engineers use in determining heat transfer and the proper amounts of air flow needed.

The problem with attic fans is in how they are marketed. Homeowners need to know that fans can only be effective if sized properly and mated with the proper amounts and placements of ventilation openings. Even then, they will not “cool” a home in the way most homeowners understand the term. Fans will only lower temperatures a bit in the attic, and will require some power to do so. Still, a little improvement may be better than nothing. If you consider using an attic fan, you will need to also decide (as with any solution suggested here) if the benefits are worth the cost in installation and operation.  This will be a topic for another article.

Equipment and ducting suffer greatly in a hot attic

A hot attic space is bad enough. But if you have equipment, ducting or piping up there, working in elevated temperatures, you can expect a stressful and likely shortened life for those items.

If you have ductwork, furnaces, air conditioners, water heaters, water piping etc. in your attic, it would be a good consideration to:

  1. Move the ducting and equipment to the crawlspace or the interior of your home.
  2. Meticulously seal seams and add reflective insulation around your ductwork
  3. Convert your attic to a conditioned space. Do this by moving a radiant barrier and insulation  to the sloped roof assembly. Spray foam insulation makes this possible but you will need to create and follow protocols to avoid trapped moisture and ventilation issues with the existing roof framing.

The point here is that if you have a hot attic space, it is going to shorten the life of any equipment residing there.

Attic Fan problems

Even though an attic exhaust fan can incrementally lower the temperature of a very hot attic, using a fan does not stop the source-radiant heat. During the day, any cooler air brought in by the fan will be heated up immediately by the surrounding structure. Most fans cannot keep up. At night, after the sun’s radiation source halts, the structure will continue to be hot for some time.  Any cooler air brought in from outside will eventually lower the the attic structure temperature, but that will happen VERY slowly. As soon as the sun rises in the morning, the radiant heating process will start again.

In the example of our client’s solar fan above, the unit was way too small to have an effect. It was only rated at 1000 CFM meaning it would take forty five minutes to replace all the hot attic air with outside air just once. It could not keep up with the radiant heat gain.

In some worst-case instances, attic fans can actually create more problems than they solve.

  • If there are not enough soffit, gable or ridge vents, a powerful attic exhaust fan can pull the air from your home through the ceiling if it is not perfectly sealed off.
  • Strong attic fans can actually back draft furnaces or water heaters by pulling combustion gases out of their burners and into the home.
  • Good attic ventilation is excellent for preventing moisture and condensation but it is usually not enough for cooling in the summertime.

SOLUTIONS

Cooling Off A Hot Attic

Steps you can take to cool down your attic – and your whole house!
Read More…

A retrofit example that works

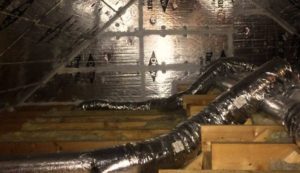
I believe the best solution may be a combination of radiant barrier to stop the sun’s heat from warming up the attic structure to begin with along with proper ventilation, attic exhaust fan(s), insulation and air sealing.

1. Seal off any air leaks at the ceiling. This prevents air/dust movement from living space to attic. This will also prevent excessive moisture from migrating in and out of your attic.

2. Install additional insulation to bring the total to over R-30 everywhere-even over the access hatch. Cover the tops of any wood ceiling joists by at least 3 inches.

3. Make sure the eave, gable and ridge vents are wide open and unobstructed.

4. Install radiant barrier foil between the rafters. You will need to allow the foil to “sag” at least an inch below the sheathing to allow an air space. You can get radiant barrier foil from Amazon here.

A reader Ken from Tennessee sent in his experience:

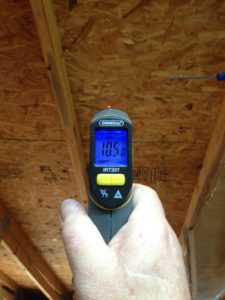
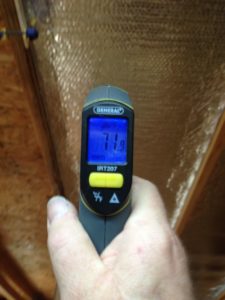
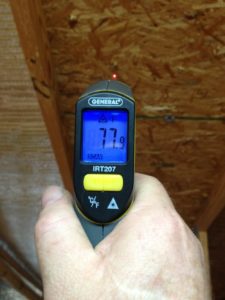
On my attached pictures I’m showing around 30 degrees on the sunny side and only 3 degrees on the shaded side.. I have a ridge vent and roof edge vents, because the contractor forgot to put soffet vents onto the house. Pictures were taken on December 12 2015, in eastern Tennessee. No attic fan.

Southwest “sunny” side of roof no insulation 105 degrees 12/15
1 rafter bay over with radiant barrier 71.9 degrees 12/15

On the shady side of the roof, the results were as follows:

Northeast “shady” side of roof 78.9 degrees
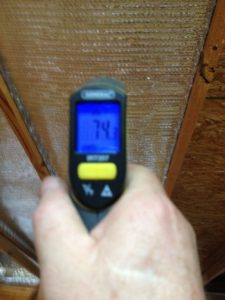
Northeast side with radiant barrier 74 degrees

Summary

If you your house has a hot attic and ceilings during the summer, the solution is a system and not simply a powered attic exhaust fan or ventilator. To eliminate a hot attic you should consider a plan that includes radiant barriers and proper ventilation This is always best done when the home is under construction. Once constructed it may be difficult or impossible to retrofit this without major work to the structure.

What you must do is prevent heat from migrating down into the home. Your plan will likely require a completely sealed ceiling, a very thick layer of insulation, radiant barriers (reflective foil layers) above the insulation (preferably between the rafters) to block the radiation and isolate your hot attic from your cool house, additional ventilation openings and possibly a powered attic fan to remove warm air from the attic at the proper exchange rate.

Consider another, even better solution, the conditioned-space attic. Our client from above eventually opted to create a conditioned-space in their attic using a foam insulation applied to the pitched roof. This created a completely cool attic, dramatically reduced power bills and easy to maintain temperatures in the second floor rooms. Although their plan cost a bit more, this solution delivered a totally cool and comfortable second floor.  I will publish more details on this option later.

No more hunting down device chargers!

Built-in device chargers
Built-in device chargers make life so nice!

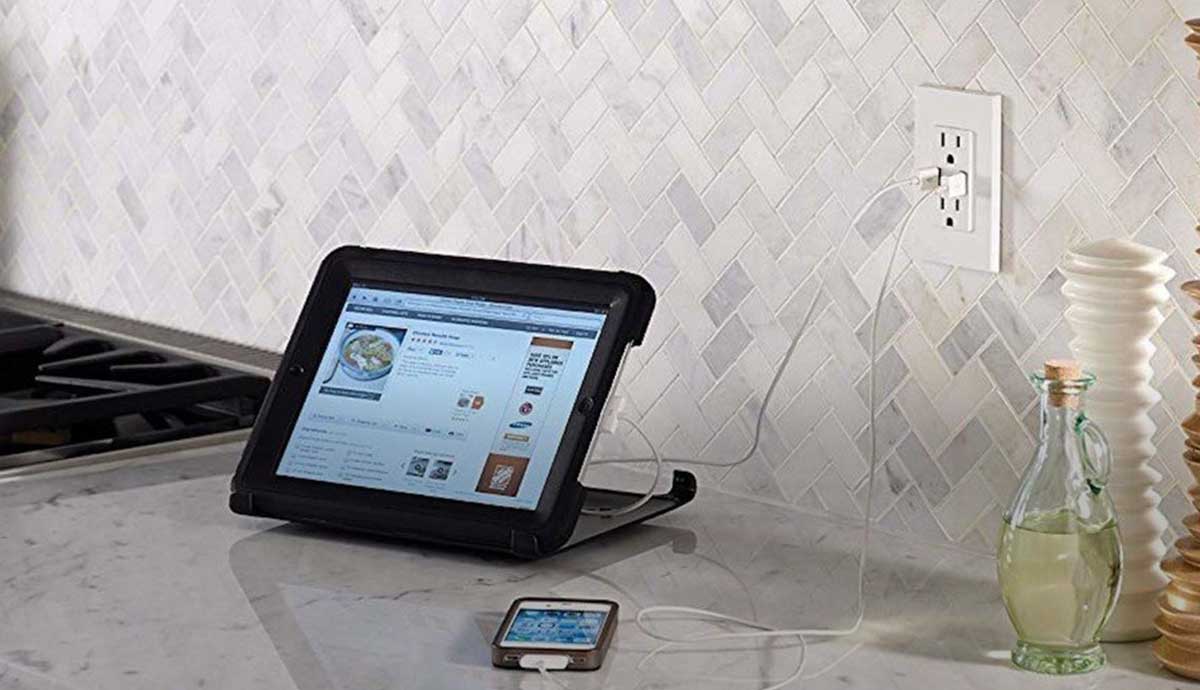
Install new Leviton USB outlets everywhere you want device chargers. Kitchen, office, living room, patios or anywhere! Convert any existing home outlet location into a fast-charging station with this powerful built-in smart chip technology.

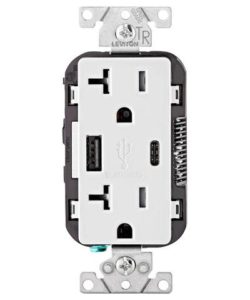
The Type A and Type-C USB Device Charger/Tamper Resistant Receptacle (shown above) offers superior charging power for smartphones, tablets, laptops, monitors, printers and more. Two high powered vertical USB Ports, one Type A and one Type-C, deliver a combined total of 5.1A charging current and 25+ watts of power. Smart chip technology recognizes and optimizes the charging requirements of individual devices and the Type-C Port enables the cables to be inserted easily in either direction. The Type A and Type-C USB Charger/Tamper Resistant Receptacle is a powerful solution to help keep your devices charged with ease and style. Use your lightning cable and charge up to 60% faster.

Outlet Features

  • Smart chip recognizes and optimizes the charging requirements of individual devices including Apple, Samsung, Nexus, Pixel and more
  • Type-C Port provides up to 59% faster charging power over competition using Lightning cable on Type-C Port with iPhone 7, iPad Mini 1, iPad Pro 9.7
  • Combined total of 5.1 A charging capacity – Type-C Port can charge a maximum of 3 Amps and the Type A Port can charge a maximum of 2.4 Amps
  • Two high-powered charging ports with 25+ watts of power
  • Type-C Port permits the cables to be easily inserted in either direction

These outlets are also available in dual Type-C, and in six colors. Contact us at info@homepreservation.com for installation or more information.

How to burn your house down without even trying!

Do you own a magnifier mirror? If so, we recommend you be careful where you mount it because it could be a fire danger!

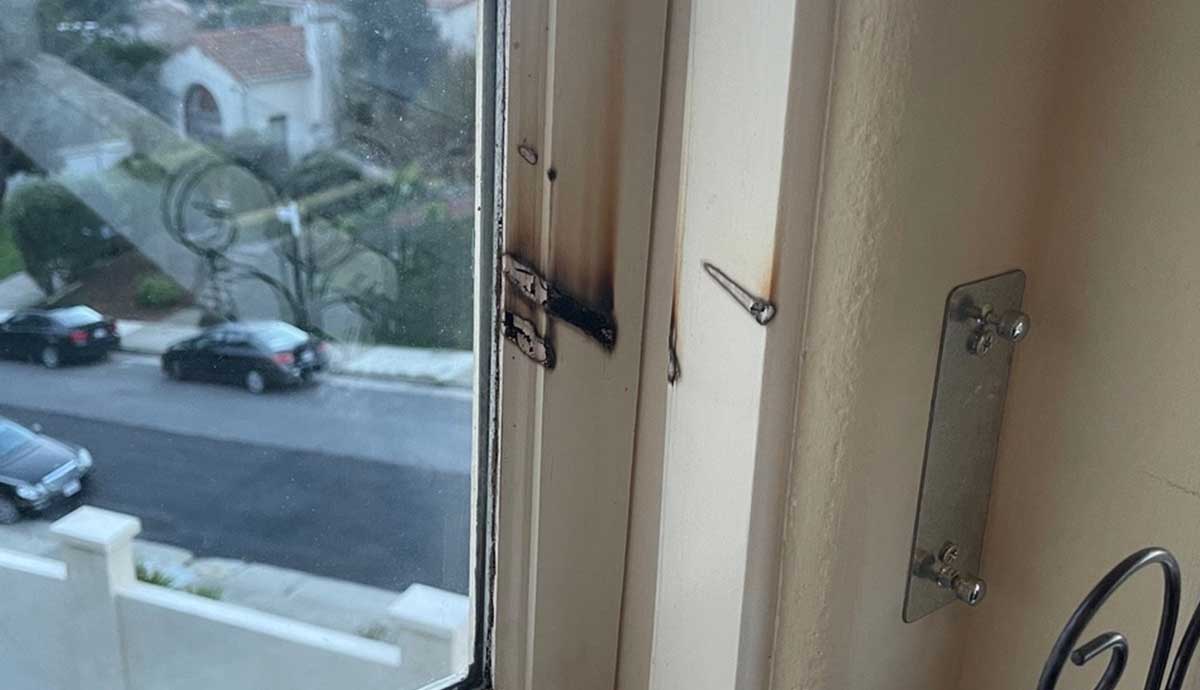
Ever heard of a “mirror fire”? In the photo below, see the dark diagonal lines on the window trim? Those are burns etched more than 3/8” into the wood. They were caused by sunlight reflecting off of a magnifier type make-up mirror. You can see the chrome mounting plate for the mirror which we removed.

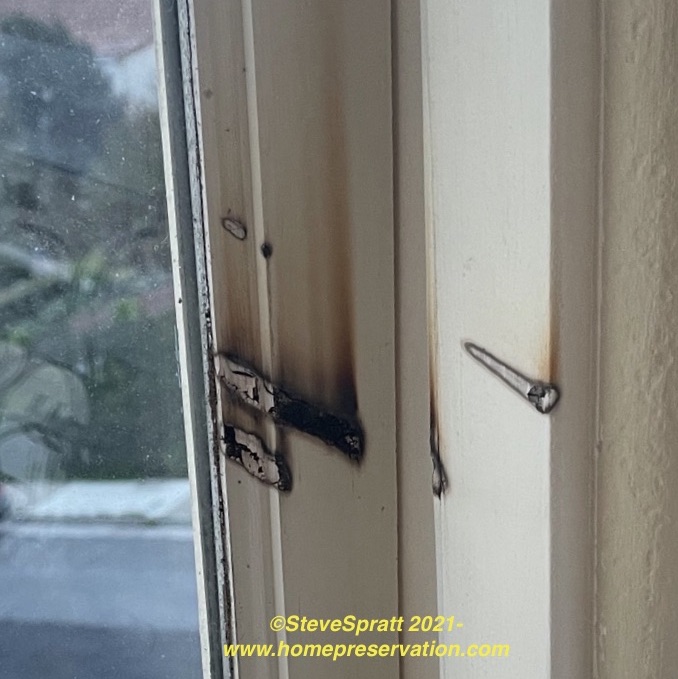
Here’s a closer view:

mirror fire

As you can see, the burning happened several times. Some of the burns even show smoke stains where the wood was clearly on fire or close to it. Our lucky HPS Stewardship customer did not even know.  

If there had been anything more flammable in the area, like curtains or a paper blind the house would surely have gone up in flames. Mirror fires are not something you hear a lot about, but there you are.

If you want to avoid issues like this, get help from HPS Palo Alto Inc. at www.homepreservation.com . We’ve seen a thing or two, too!

EarthTalk: Environmentally Friendly House Gutters

When new gutters are needed, consider green choices

Originally published in the Christian Science Monitor


By The Editors of E Magazine

Q:We will need to replace our house gutters soon. What are our best options from an environmental perspective?
– Jodie Green, Dallas

A: Use a material that is the most durable for your climate. Ultimately, the longer your gutters last, the less environmental cost there will be – from manufacturing to recycling. A cheaper product that degrades twice as fast as another would not be the best choice, even if it has a greener production process. Also, the extra cost of having to fix your water- damaged home could make a “cheaper” gutter in reality much more costly.

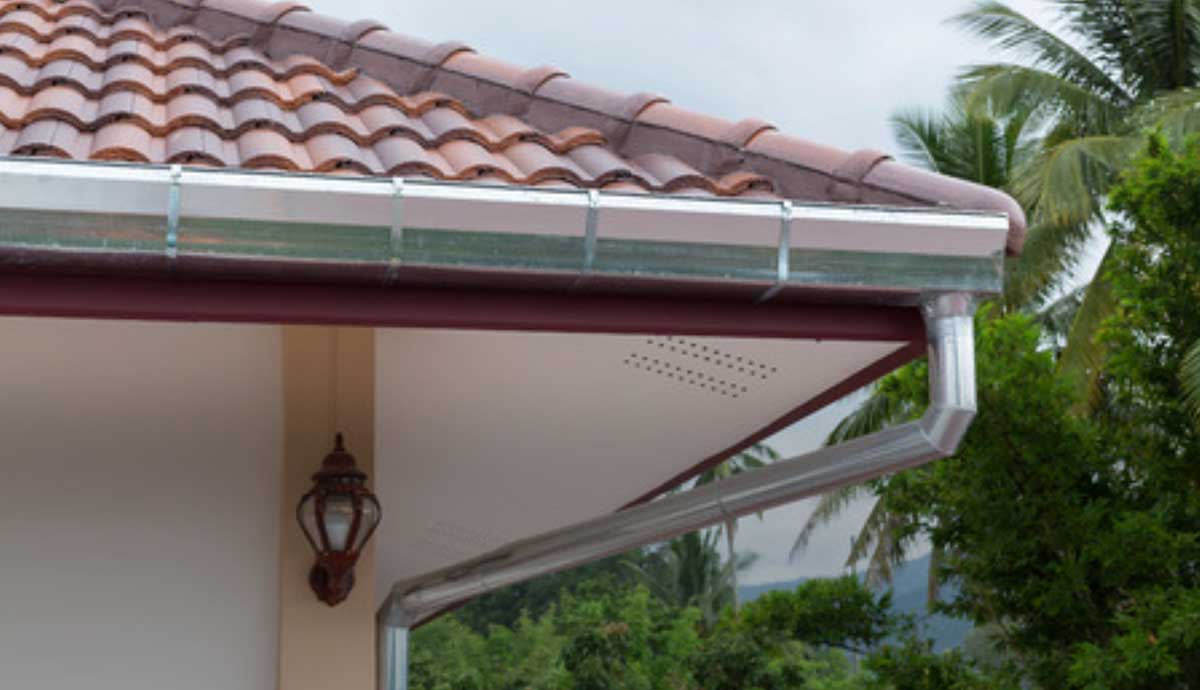
“Galvanized steel, copper, and aluminum are preferred gutter materials,” reports Austin Energy, the Texas capital’s community-owned electric utility. Copper is a more expensive, high-end gutter material, as are stainless steel and wood, although wood is used mostly in historical restoration.

According to home improvement expert Don Vandervort, who writes for ThisOldHouse.com, galvanized steel and aluminum each have big pluses. Steel is sturdy, while aluminum will not rust. Copper and stainless steel are sturdy and lasting, too, says Mr. Vandervort, but they can cost three to four times as much as steel or aluminum.

“Steel gutters can stand up to ladders and fallen branches better than aluminum,” he says. “But even thick galvanized steel eventually rusts.” He advises buying “the thickest you can afford.” Austin Energy says that gutters should be a minimum of 26 gauge galvanized steel or 0.025 inch aluminum.

Polyvinyl chloride (PVC) is also used for gutters, but “can get brittle with age or in extreme cold,” says Vandervort, and they cannot carry as much snow load as metal gutters. PVC is also not a very green-friendly choice. When produced or burned, says the Center for Health, Environment and Justice , PVC releases dioxins.

Replacing your gutters can provide an environmental opportunity, because the way you handle your roof’s water is important. Consider linking your gutters to a “rooftop catchment system” that captures rainwater in a cistern or rain barrels and can then be used to water nonedible plantings.

Efficient water use is a guideline in the US Green Building Council’s LEED (Leadership in Energy and Environmental Design) for homes standard for certifying green-built homes.

Finally, if you have a problem with debris in your gutters, consider a RainTube. This recycled-plastic gutter insert (which won the 2008 Sustainable Product Award from Green Building Pages) keeps gutters clear of debris, preventing overflow into your house. Of course, cleaning your gutters now and then is probably the best environmental option because it may head off any need for replacement or modification.

Creating A Home Repair Emergency Fund

You may already have enough in savings-just make it more accessible

Any unexpected large home repair is bad enough; but combine that with having no way to pay for repairs or temporary shelter and you have the ultimate home disaster. A home emergency fund can help to save you from financial discomfort or worse. Even if you believe your house is in great shape, you never know when you’ll have to deal with a surprise repair.

Even if you diligently perform recommended preventive maintenance tasks and follow all the rules for making proactive replacements, you may not be able to protect yourself from an unexpected catastrophe. Our poor friends in Texas this year, with no power, frozen pipes and flooding will attest to that. But you can still be prepared by having an emergency repair fund handy. 

What’s a home repair emergency fund? 

A home repair emergency fund is money set aside to pay for unexpected, emergency-type home repairs. These repairs are considered normal but not predictable. I am not talking about natural disasters, wars, riots or alien invasions, but having an emergency fund can help with any of those also. 

An emergency repair fund should consist of money available in a readily liquid form. Not cash, but a checking account with access to funds. You don’t want to have the money in a long-term savings portfolio where you’ll face massive fees if you pull money out early.

Homeowners don’t need to get too creative with an home repair emergency fund. A simple savings or money market account will suffice so long as it is separate from your normal checking account and thus less visible and tempting. The most important thing is the money must be there when you need it. A useful option is to have access to cash through a debit card or a pre-approved line of credit. Credit cards can work as a temporary resource also, but you will be faced with huge fees and interest rates if you don’t pay it completely off when due.


Even if you believe your house is in great shape, you never know when you’ll have to deal with a surprise repair.


How much money should you save in your emergency fund?

Some financial advisors suggest that homeowners create a cash reserve of three to six months of living expenses. Others recommend you have a cash reserve target of about 1% to 3% of your home value. So, if your home is worth $500,000, this suggests setting aside $5,000 to $15,000.

A good way to check if you’ve saved enough is to learn what items are most likely to fail in your home, then allow for the highest possible cost to repair/replace them.  Some examples of the most likely items to fail are: Emergency water heater replacement $2500-$5,000; burst pipe water damage $10,000-$100,000; hot water re-circulator pumps $600-$800; septic systems $5,000-$10,000; gutter replacement $2500-$5,000; downspouts $600-$1200; drainage system failures $4,000-$8,000; sump pump replacement $500-$1,000; dishwasher flooding and replacement $1200-$5,000; spoiled refrigerator/freezer food $400-$800; down tree removal $3,000-$8,000.  Some of these numbers are staggering.

Of course, each situation is different. A new home with all new systems and appliances is less likely to tap into a home repair emergency fund for many years. Fixer-uppers and older homes, of course, will probably require that money sooner. Larger homes should have a larger fund than a smaller home. 


Some financial advisors suggest that homeowners create a cash reserve of three to six months of living expenses. Others recommend you have a cash reserve target of about 1% to 3% of your home value.


General emergency funds

In addition to a home repair emergency fund, it’s also wise to create two general emergency funds: an everyday emergency fund and a disaster fund. Everyday emergencies—such as a worn out dishwasher in your home—can cut into your monthly budget, so having some cash stowed away will allow you to still pay your rent or mortgage. Work toward having about 10% of your annual wage in your everyday emergency savings account tor if you’re self-employed, put aside 20% since the income is likely to be more variable.

The second emergency fund—the disaster fund—is for life’s calamities that interrupt your income. It could be suffering a natural disaster, losing your job, falling ill and/or needing to take time off work, dealing with a death in the family.

The concern is when something catastrophic happens that people could risk losing their home because all suddenly they can’t make their mortgage payment.

Work toward saving 20% of your mortgage balance for the dire emergency fund. If you put aside money automatically from each check and you’ll quickly begin to get closer to your goal. For instance, putting aside $25 every week will get you $1,300 in a year.

“Put aside” means to have a savings account where the money is readily available through checks or a cash card. Use a savings or money market account for your emergency fund. Something that is safe, low risk and easily accessible when needed.

What if you have too small an emergency fund

Let’s say your septic system dies in the middle of summer and you desperately need to replace it, but you don’t have a home repair emergency fund. Where do you turn? Two options are a home equity loan and a home equity line of credit, or HELOC.

Both of these solutions let you tap into the value of your home to cover emergency costs. A major difference is that the home equity loan is a lump sum and you often have a fixed interest rate.  Equity loans take longer to approve and longer to fund and thus may be unacceptable for an emergency situation.

HELOC is a line of credit that you can borrow. These are usually set up in advance and the homeowner can draw on the money quickly and at any time. A HELOC lets you draw money from the account as much as you need up to the available maximum amount. Also, a HELOC usually has an adjustable interest rate. 

In a worst-case situation, without some emergency amount saved, a credit card may have to do.

Six Disaster Preventers Every Home Needs!

Current times have been tough for homeowners. Just when your home needs to serve as sanctuary for you and your family, it seems to be under attack from all directions. Disaster safety and prevention is more important now than ever.

This winter has shown that severe weather can happen anytime, anywhere and affect anyone. In addition, both natural and man-made disasters like fires, floods, power outages and earthquakes lurk around every corner.  

When a disaster strikes and you really need help, it’s too late! Stores are closed, materials are sold-out, contractors are suddenly unavailable, and first responders are overstressed, or defunded. Experience tells us that when a crisis happens, you need to be able to get through it on your own.

I’ve prepared a list of the most important things you need to help you get prepared.

The big six!

Here are the six most high-priority, disaster deterrents you must do right away.

  1. Whole-house inspection
  2. Regular maintenance and timely repairs
  3. Back-up power system
  4. Leak sensing main water valve operator
  5. Seismic gas shut-off valve
  6. Video doorbell

Whole-house safety inspection

Homeowners distracted by the unending demands of daily life don’t have the time (or ability) to keep track of the condition of the home.  Time speeds by and the condition of your home can slowly deteriorate… till it’s too late. A regular whole-house inspection will keep you informed of your home’s condition and bring attention to potential disasters in the making.

Maintenance and repairs

Once you have the inspection, you must act. Make the repairs that are needed and don’t delay. Then commit to regular routine maintenance to help keep repairs at bay and make everything last longer. Check out the HPS Stewardship program.

Back-up power

A standby generator system has become the single most important disaster safety and prevention feature for any home built in the last 50 years. A backup energy system is not just a convenience, it is mandatory for the protection of all modern homes with features like electronic controls, finished basements, sump pumping stations for flood control, sewage ejector systems or uninsulated water lines.

Even small generators can help prevent the house from freezing, keep critical systems like pumps and ejectors working and avoid the flooding and other catastrophic damage. More sophisticated systems consisting of automatic switching, a battery bridge and a properly sized whole-house generator can seamlessly bridge any power outage so you don’t even know it happened.

Leak sensing water shut-off device

These “smart” devices are able to determine when an abnormal water leak has occurred in the home and will automatically shut off the main water supply. These are fairly new (in the last 10 years) but have proven extremely effective at saving millions of dollars in floods from frozen pipes, loose refrigerator water lines or any other plumbing disaster involving failed and flowing water lines in the home.

HPS has installed many of these marvelous devices and have saved untold amounts of damage and distress. They require professional installation near an electrical outlet, a new valve on the main water line and the programming of the unit so that it becomes “aware” of your water use habits.

Seismic gas shut-off safety device

Seismic safety and prevention shut off valve
Seismic gas shut-off valve

Here is another simple but effective device.  A seismic valve eliminates the need to manually shut off your gas service during an earthquake. The device senses the movement of the earth and shuts off the gas. The gas flow can then be re-established by manually resetting the valve once you have determined it safe to do so.

These devices are installed between the gas meter and you home on the main line and require no power. We have installed dozens of these devices. They are simple, effective and foolproof.

Ring doorbell and video surveillance

Video surveillance of the entry of your home is now as easy as installing a new doorbell. The video camera is activated anytime the doorbell senses movement and records the time and date of each occurrence so you can retrieve and review at any time.  The video is accessible wirelessly on your smart phone or computer. Additional cameras can be installed around the home to get complete coverage.

Do these six things now!

Don’t become a victim. The Big Six are easy to deploy and will help you to avoid or get through even the most difficult scenarios. If you need help with disaster safety and prevention, HPS can provide more information or do all these things for you. Just contact us at www.homepreservation.com.


Study Confirms Stewardship is Strong Environmental Strategy


Finally, a formal study has confirmed what I have been advocating and putting into practice through my company now for over 25 years. Properly caring for and maintaining our existing home inventory results in enormous benefits to the environment compared to building new. Stewardship is proven to be a powerful and affordable environmental strategy.

The study looked at both commercial and residential buildings in Portland, Phoenix, Chicago, and Atlanta and revealed the potential for large carbon impact reduction by comparing the relative environmental impacts of building maintenance, reuse and renovation (Stewardship) vs. new construction over an assumed 75-year period.

“It makes sense that if you don’t have to replace something, you avoid having to use up labor, energy and raw materials to make it.”-Steve Spratt

Contrary to popular belief, the benefits of reusing and renovating buildings far outweighed the benefits of constructing new energy-efficient structures. According to the study, a new building that is even 30% more efficient than the average building takes up to 80 years to overcome the negative climate change impacts resulting from construction.

Even building re-use projects that produced carbon impact reductions that seemed small when considering only one building, showed substantial savings when large numbers went under the microscope. The highest returns came from simply maintaining existing structures properly. The returns came from reduced failures and increases in durability and life while maximizing operational efficiency. It makes sense that if you don’t have to replace something, you avoid having to use up labor, energy and raw materials to make it.

“…building reuse can avoid unnecessary carbon outlays and help communities achieve their near-term carbon reduction goals…”

“If the city of Portland were to retrofit and reuse the homes and commercial office buildings that it is otherwise likely to demolish over the next 10 years, the potential impact reduction would total approximately 231,000 metric tons of CO2 – approximately 15% of their county’s total CO2 reduction targets over the next decade,” so says the Preservation Green Lab, a division of the National Trust.

Roughly 82 billion square feet of existing space will likely be demolished and replaced between 2005 and 2030, representing about 25% of the existing building stock in the U.S., projects the Brookings Institution. Reusing these buildings and renovating them for higher efficiency – especially with renovations requiring fewer material inputs – have the potential to realize the greatest short-term carbon savings, the study authors note.

“Most climate scientists agree that immediate-term action is crucial to staving off the worst impacts of climate change,” the research stressed. “This study finds that building reuse can avoid unnecessary carbon outlays and help communities achieve their near-term carbon reduction goals.”

Bottom line, Stewardship is a better environmental strategy than building new. Maintenance matters.

Want to live better AND help the environment? Contact HPS Stewardship now!

Source: Preservation Green Lab, National Trust

Avoid being a real estate loser

How Homeowners Can Avoid Being Real Estate Losers

A strategy for maximizing the value of your home…and enjoying it more too!

If you’re thinking about selling your home and wondering what you should do to fix it up, I’m afraid I have bad news.  It may already be too late.  I hate to tell you that you are about to lose time, money, and any enjoyment the sprucing up of your home would have brought you.

It’s true, even if you rake in a ton of equity from appreciation, you are still losing out because you will not be getting anywhere near what you could and should have. The reason is simple and it’s a lesson that most homeowners learn too late.

The more marketable your home is kept, the more value it has.

Here’s the secret: Even if you do not intend to sell your home…having the ability to market it quickly makes it more valuable. In other words, the faster it can sell, the more it is worth.

Your home is not a “liquid” asset and getting money from one is not like cashing a check at the bank. Selling a home is complicated and takes time…and time is money.  Once you have decided to sell, you will need to hire a realtor, have the home inspected, perhaps fix it up, set a price, advertise, market, hold open house, entertain offers, open escrow, allow buyer inspections, repair problems, negotiate the price further and hopefully the buyer can secure their loan and finally, actually close the sale. All this can take months even if your home is in perfect condition…and it probably is not.

Today’s home buyers want homes that are in good, and preferably excellent condition. Fixer-uppers are not desirable and will be avoided or heavily discounted at best. If your home needs work the selling process will take longer, and there will always be more work than you expect.

Your home has to be exceptional as it will be competing with others for buyers and these days home shoppers are very sophisticated, more demanding and much less handy than in the past.  Buyers will be hiring professional inspectors who will pick your home apart if it is not in good shape. Splashing a little black paint on the front door and replanting a few dead shrubs is not going to cut it if you really want to get top dollar. And you do!


Waiting around till the last minute to fix up your home for sale is the worst possible strategy.


don't be a real estate loser

Bottom line, having your home ready to sell at any moment makes it more valuable. Conversely, waiting around till the last minute to fix up your home for sale is the absolute worst possible strategy.

“Fixing up” will cost more than you think. It will also take longer than you want, and as a final insult, you will not get to enjoy the benefits from any of the improvements. Those will go to the lucky buyer.

Forget about enjoying the new paint, carpet, water heater, cooktop, oven and shower etc. …you waited too late.

Here’s my tip. The way YOU can get maximum value from your home is to do something almost no homeowner ever does…start planning for the eventual sale the minute you take ownership.

With my strategy, you can avoid falling into this money losing trap while enjoying a nicer home too, but you need to start now.   This is what I call the “live like royalty” strategy. Keeping your home in palace-like condition all the time.

Start living better!

And here’s the really good part.  In order to make your home more valuable you must start living better.  Yes, you have permission.  You must stop delaying repairs, stop avoiding replacing those aged appliances, stop deferring maintenance and start enjoying your home more while keeping it at top value at the same time. It means everything about the home is maintained proactively and kept in excellent condition. The way it must be to sell. And you get to enjoy living in it that way!

Why don’t most homeowners do this? Good question.  Many can barely afford to buy the home and perhaps do not have the resources to care for it. Some simply do not know how. Some have no time. Others are just misinformed and think that this big expensive home will never wear out.

It will.

I’m sure there are other reasons why homeowners don’t do this, and I am trying hard to inform them otherwise… but seriously who cares? As long as you know better… your home will be more valuable and more fun to live in… and that is what matters.
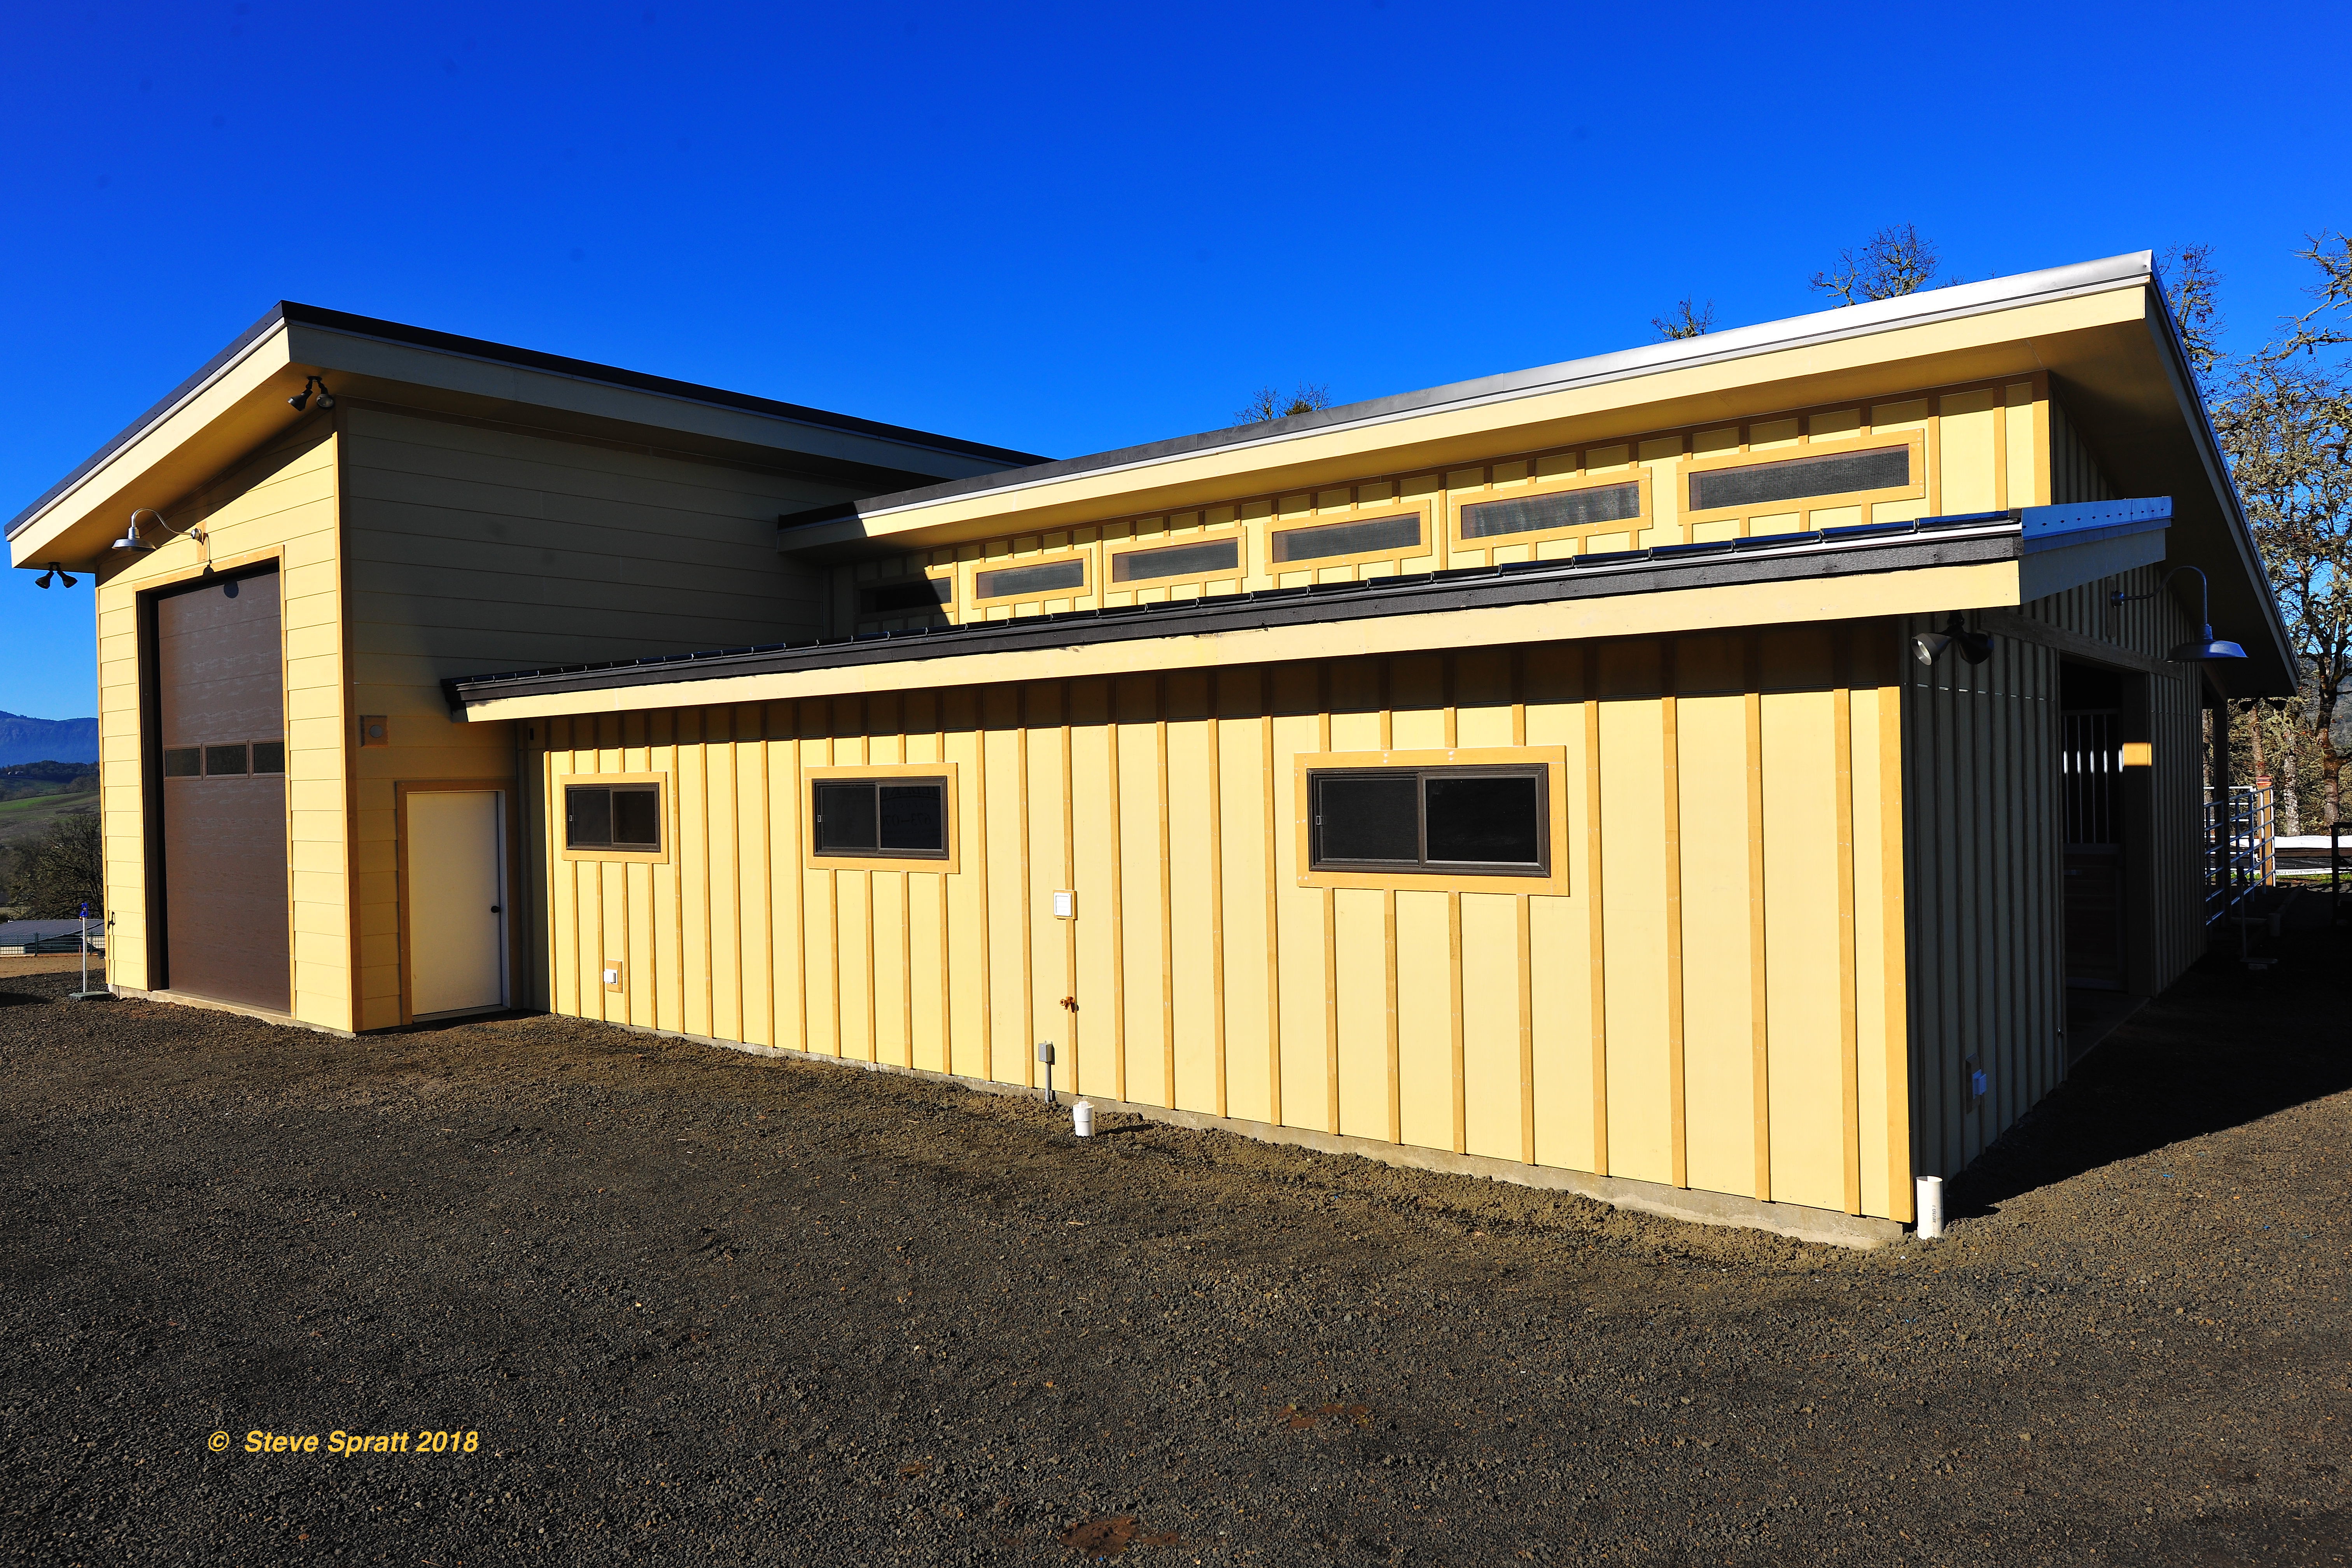
If you have $500,000 in cash, the best way to keep it from drifting away is to put it in a bank vault. Unfortunately, you can’t put your home in a vault, so the best way to maintain its value is to keep it in perfect condition… through a smart Stewardship strategy from HPS.

Want to know more?  Keep reading this website or go to www.homepreservation.com and learn how they can do it all for you. This year HPS is celebrating 25 years of service to Silicon Valley’s finest homes and smartest homeowners.


How fast does a new home deteriorate?

The answer is much faster than you think!

Your new home needs maintenance
Welcome to your new home! Now get to work…

A brand, new home is truly a wonderful thing. It’s all yours! No other human has ever lived there. Everything from the kitchen to the garage is fresh and clean and shiny. Doors and windows work smoothly, and the paint is still clean and free of marks. Even the cabinets are empty and waiting for your things to arrive.

False security: New homes need maintenance too!

Along with a fresh smell, the new house also brings to the new owners a fresh feeling of confidence and security. Like a new car. You are certain nothing can go wrong now. After all, everything around you is new. And it has a warranty. Right?

Actually no!  This line of thinking is a big mistake.

Deterioration starts early

Your new home is largely an organic entity, so even before it was completed things were starting to go south.  Wood was beginning to lose moisture and shrink. Some timbers were beginning to twist or crack. More than a few bugs, including termites and other organisms were already finding a home in your new structure.

How do I know that? I know these things because this is my business. I witness these goings-on all the time. But rather than lecture you with anecdotal truths, I’ve decided instead to document and report the deterioration of my own “new home”. A kind of case study in attrition and chaos theory.

A case study 

To document how even a new home needs maintenance, I’ll perform regular inspections and record all the things that I find going wrong. I’ll then report them to you by posting them on this website. I’ll include images and even tell you the things that went right. In addition, I’ll also report on why it happened, describe the various repairs needed and report the cost in both time and money.

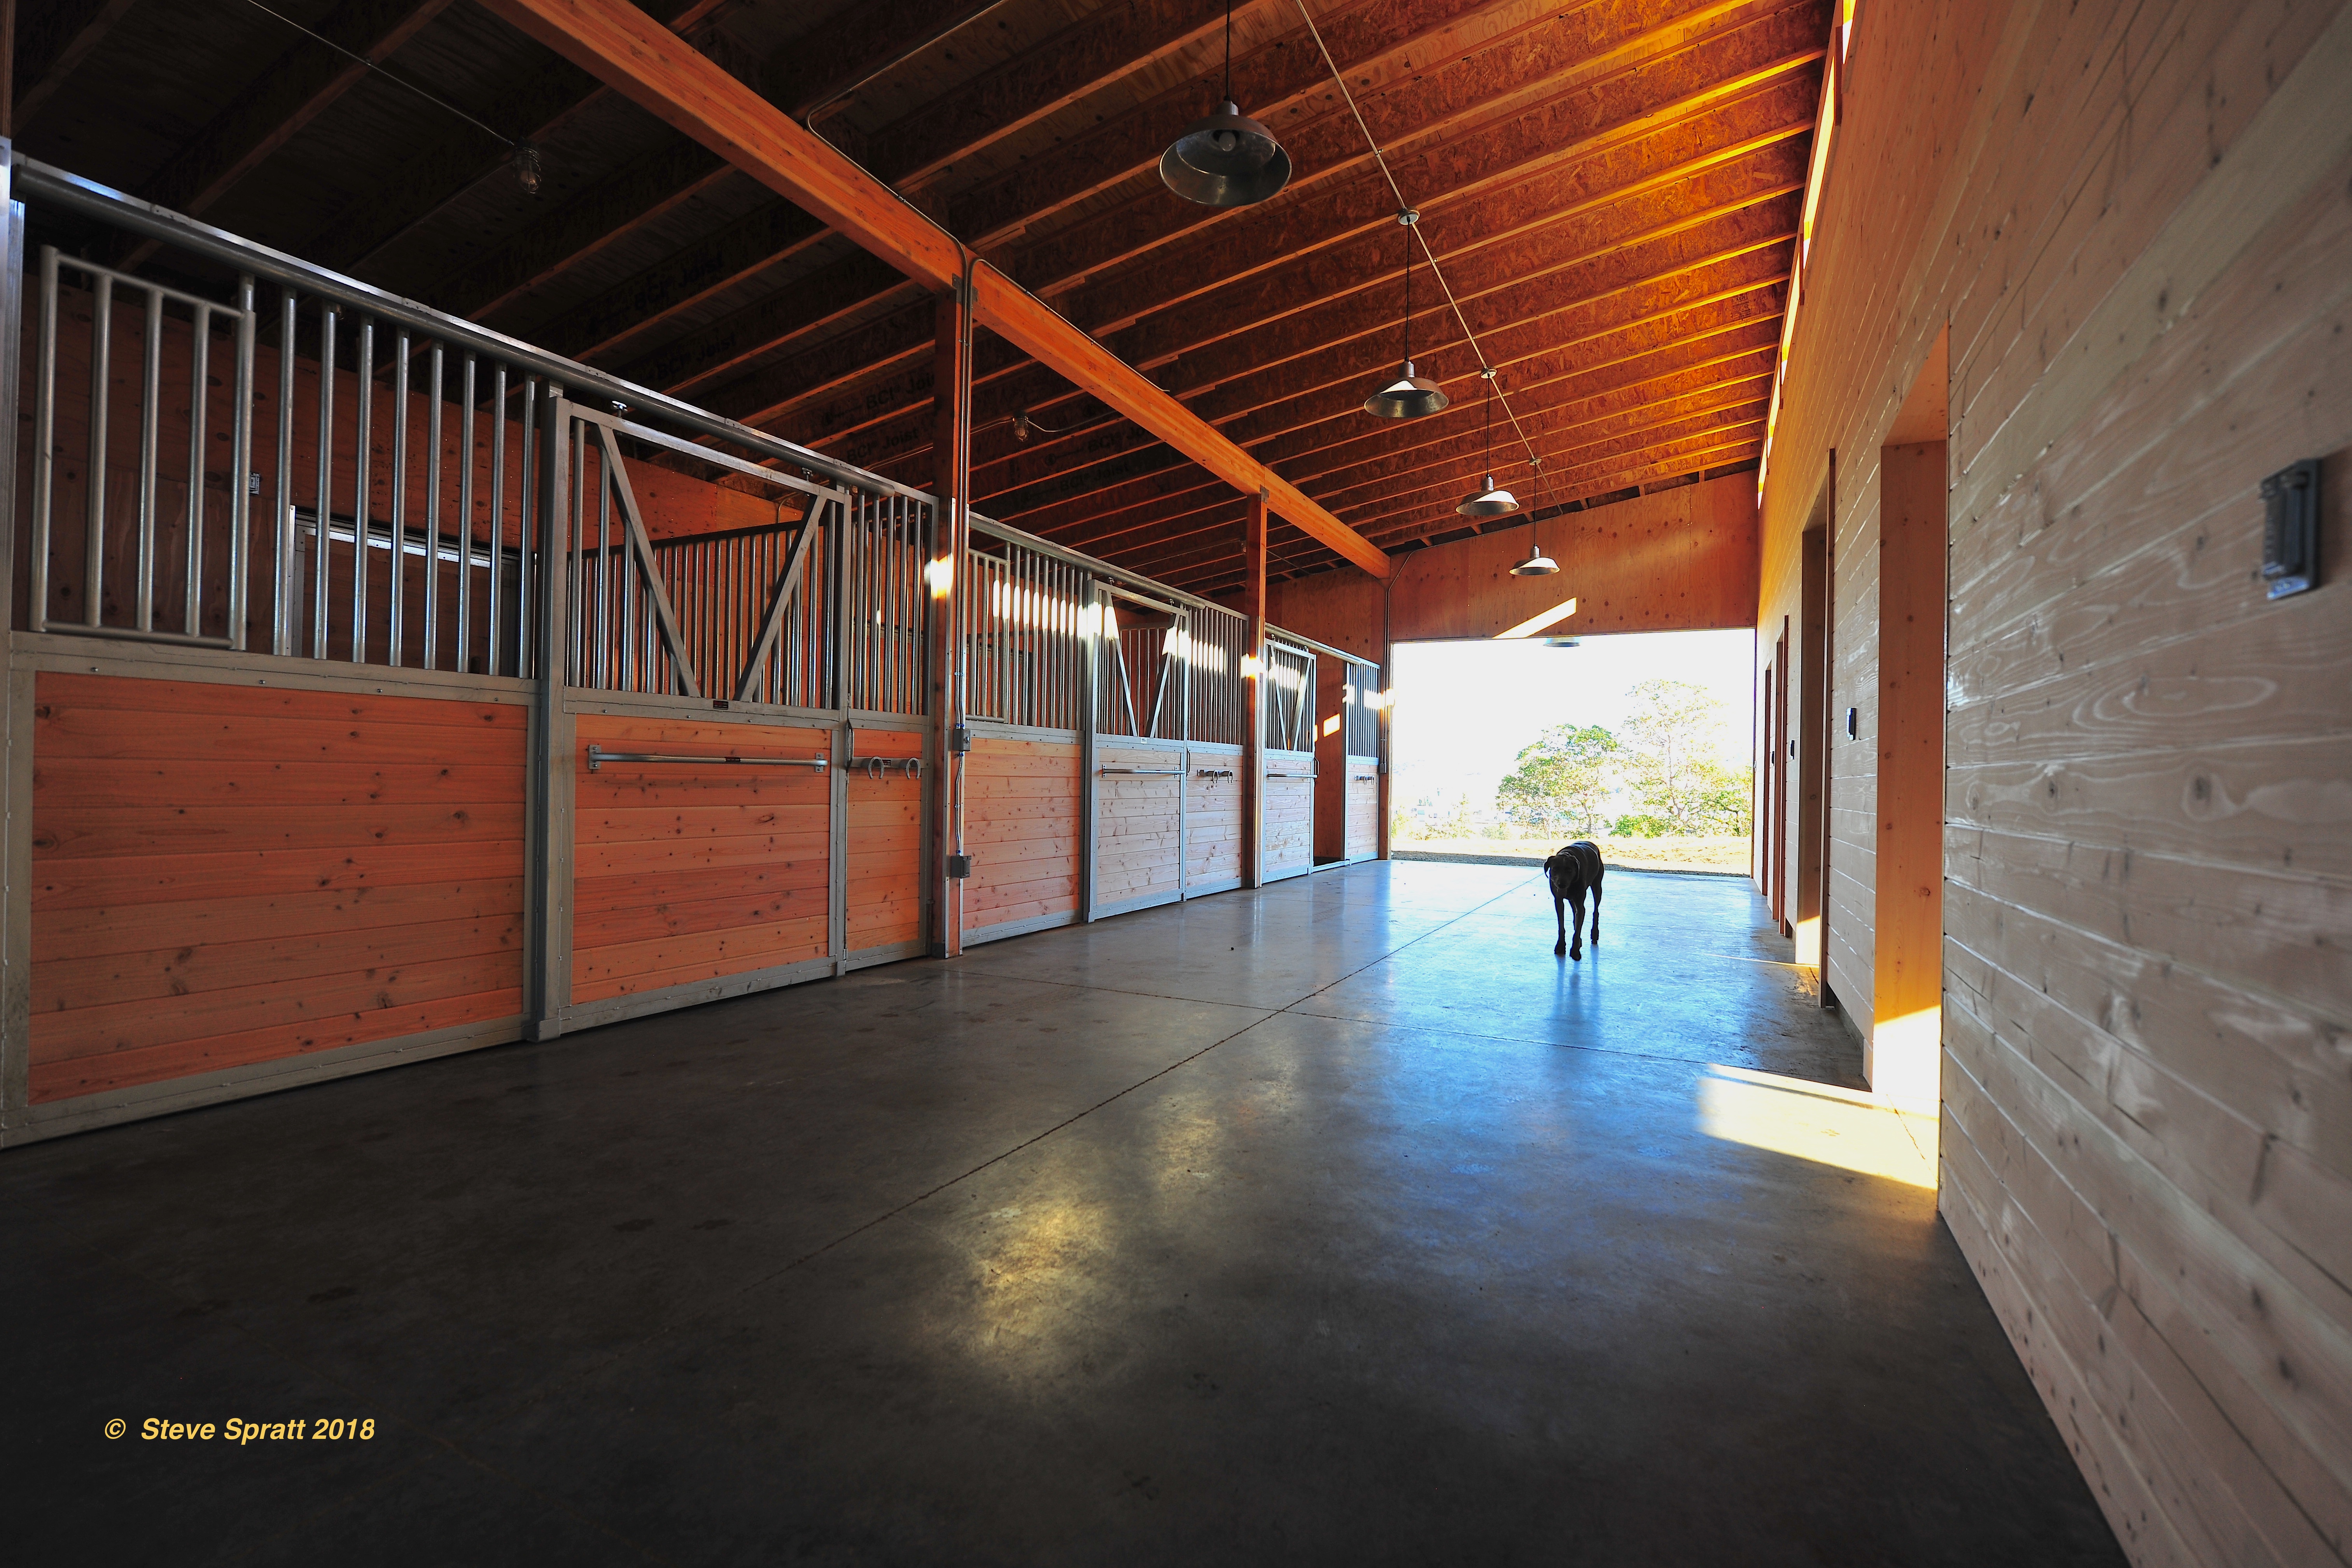
We finished our new custom home in October 2017.  Me, my wife, and our dog Bella moved in just in time to have our first Thanksgiving dinner in the home. We were ecstatic to say the least… especially after two years of planning and construction.

At this point, I think some context about the construction of my home is important.  First, I built my house with durability in mind. I hired the best contractor and designer in the area. They in turn hired and supervised the best support team and subcontractors. We also used top quality materials. Not exotic materials, just top quality. Then we carefully selected where to use them to maximize durability and ease of maintenance.

Quality and durability

 Everyone on our build team did their best to produce a home that would last for ages. And the completed home is a jewel. It has won a number of awards for excellence including the Peoples Choice and Best Home awards from its entry into the home builders show in 2018. It also won an award for the best driveway paving in the state of Oregon for 2018.

I think you will be as surprised as I have been at how many things have needed attention despite all the planning and effort. Some fails were quite major and expensive. Also notable is that the first twenty six items all occurred in the first 22 months that we lived in the home. I think it will be an interesting study.

Follow along

If you are already signed up with www.homepreservationmanual.comto receive our checklists or newsletters you will get automatic notifications as more items are found. Please sign in if you have not done so. Or simply check back often to see how things are going! 

…and DON’T ignore your home every. Even a brand new home needs maintenance!

Chronology of issues:

Move In

October 15, 2017

Move In

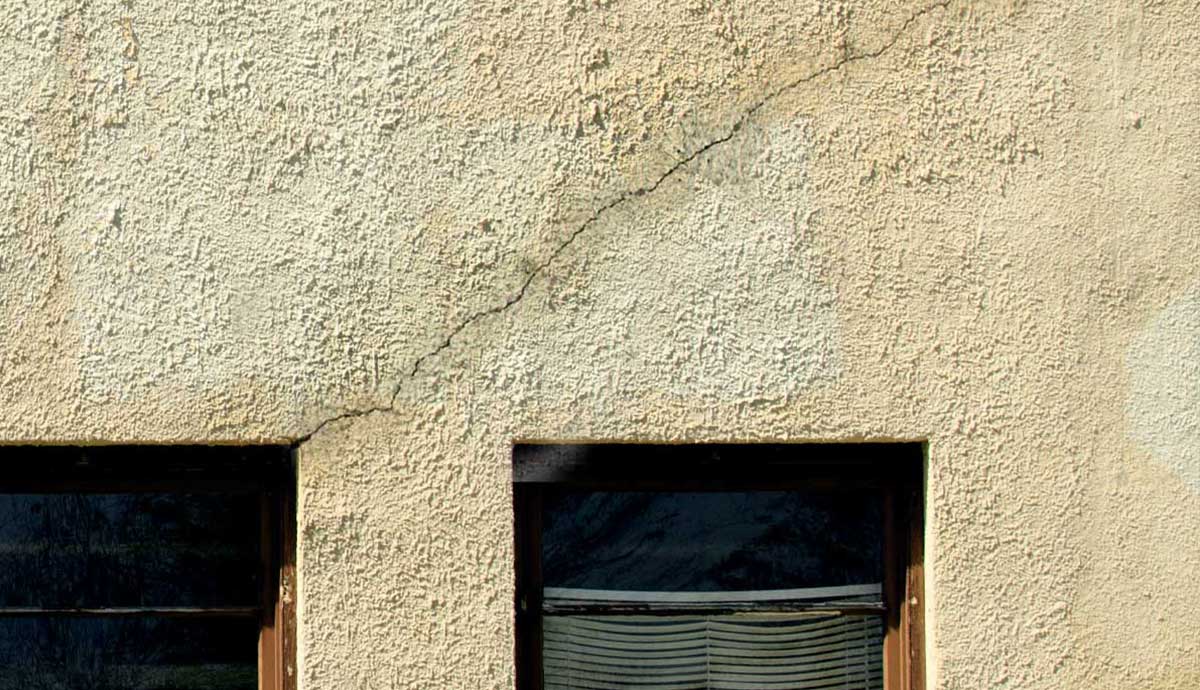
Inspection discovers a stucco crack

January 15, 2018

Inspection discovers a stucco crack

The first thing to fail was a large 6’ long horizontal crack in the stucco on the front of the home. We reviewed construction photos and found no reason for the crack. The contractor removed the entire area of stucco and redid the work. It has been fine since. N/C

Roof protection tape

January 25, 2018

Roof protection tape

New metal roofing comes with a blue protective plastic coat to keep it from scratching during installation. By the time the material for the barn was installed it had been sitting for nearly a year. When the clean-up crew tried to remove the protection, it would not come off.  Half of the barn roof was replaced N/C

Inspection discovers a failed IGU

March 14, 2018

Inspection discovers a failed IGU

During the first winter we discovered that the insulated glazing unit (IGU) of the center kitchen window had failed. Pella replaced the unit at no charge.

Inspection discovers the main line from septic tank to leach field has failed

April 24, 2018

Line appears to have had a weak glue joint in the line. This would not have been found without an inspection that noted the excessive moisture on the ground. Original contractor makes repair at no charge.

Change air filters

April 24, 2018

Scheduled change of filters 2x/year for two furnace air-handlers. Cost: ½ man hour plus $75 for four filters.

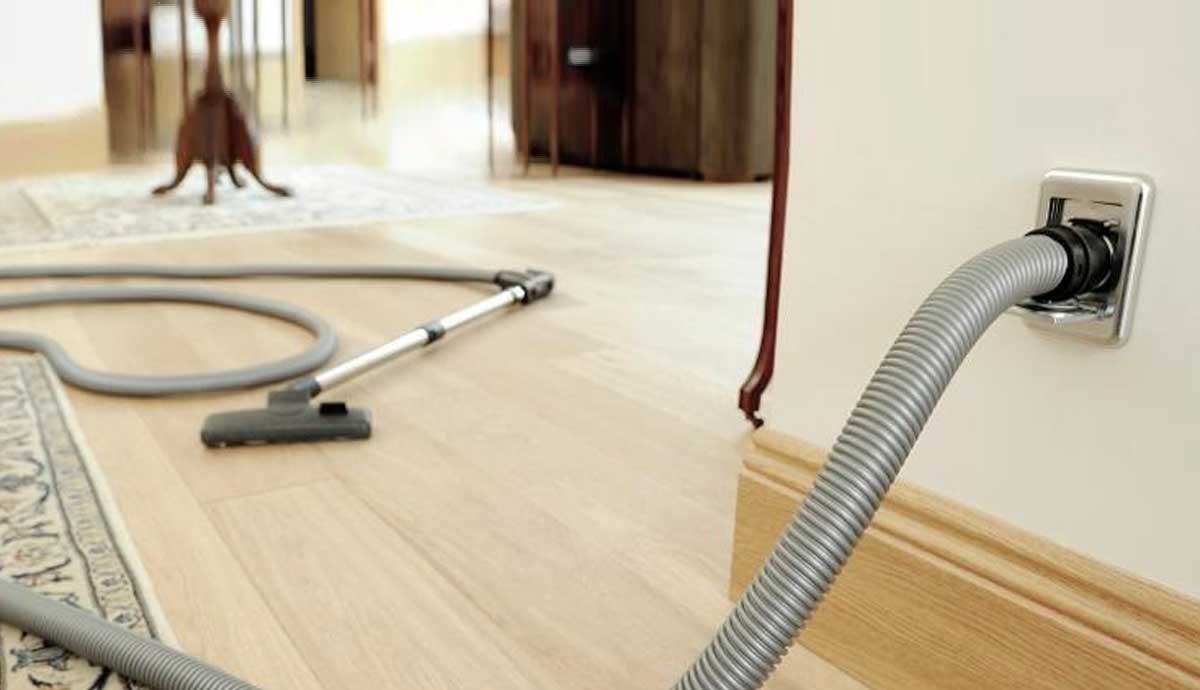
Housekeeper reports problem with vacuum hose:

June 15, 2018

Housekeeper reports problem with vacuum hose:

Hose will not retract into the wall as designed. Turns out this was caused by housekeeper not understanding how to work the system properly. Subcontractor trains housekeeper and makes repair at no charge.

Install power shades to prevent sun damage

June 19, 2018

Install power shades to prevent sun damage

Large west facing windows collect too much heat in the afternoons. Installing electrically operated shades cut the heat by 80%. Cost $3600

Window cleaning difficulty

June 20, 2018

Window cleaners report that high windows require scaffold to clean safely. We strike a deal with the window washing firm to clean/dust/inspect the entire upper ceiling area (exposed beams, large fan, window-sills, etc.) at same time that windows are cleaned in order to get full use from the scaffold cost. Upper reaches of the home would not otherwise get needed attention. The first inspection reveals peeling paint, spider nests and webs and heavy accumulations of dust. The peeling paint was touched up by original contractor at no charge.

Change water and air filters

October 24, 2018

Scheduled change of air filters 2x/year, and water filters 1x/year. Cost: 1.5 man hours and $251 for filters (one of our water filters is expensive)

Inspection finds batteries missing in the fireplaces

February 26, 2019

Inspection finds batteries missing in the fireplaces

An extended power outage left the house without heat. Attempts to start the fireplaces failed and it was discovered that the back-up batteries had not been installed. Cost: ½ hour labor plus eight AA batteries $6.

Snow Damage

February 27, 2019

Snow Damage

Inspection finds snow collapsed a tree onto the wood fence shattering a post and breaking four redwood fence boards. New boards were installed by homeowner. Cost: 3 man hours and $100 fence rail material

Snow bends the gutters

March 3, 2019

Unusually heavy snowfall had accumulated on the roof for a week. As it melted and slid off, parts of the perimeter roof gutters were damaged. This has not yet been repaired.

Inspection reveals that snow/cold has killed three cacti in the landscape

April 15, 2019

These will not be replaced as we will have cold weather again and feel this particular  plant would not hold up well.

Inspection finds that the main barn sliding door is stuck

April 15, 2019

Inspection finds that the main barn sliding door is stuck

Homeowner adjusted the door hardware and to prevent dragging and door works fine. Cost: 2 hours labor

inspection finds that one of the window frames in the kitchen is delamination on the exterior

April 17, 2019

We reported this to our contractor who determined it to be a factory defect.  The window manufacturer has agreed to repair. Unfortunately the window is a small cost as the window will need to be ordered (six weeks), the old window must be carefully removed and the new window installed with patching to blend into existing finishes. This is no easy job as the existing window abuts to marble in the interior and is surrounded by stucco on the exterior. Heavily inconvenient, we have no cost data yet.

Change air filters

April 24, 2019

Scheduled change of filters 2x/year for two furnace air-handlers. Cost: ½ man hour plus $75 for four filters.

Window cleaning firm finds spiders up high in beams on both interior and exterior

June 15, 2019

Window cleaning firm finds spiders up high in beams on both interior and exterior

These are difficult to see or clean from below. Contractor agrees to clean and dispense a spider insecticide. Cost: $150

Inspection finds that hall closet shelves have collapsed

June 30, 2019

The pins holding an upper shelf came out of their pockets and allowed the top shelf to fall onto the shelf below starting a chain reaction. There was nothing stored in the closet yet and no damage was done. Contractor has agreed to repair at no cost.

Inspection reveals that an LED downlight had quit working in the entry beam system

June 30, 2019

This has yet to be replaced. We estimate an hour of electrician time and a new fixture approx. $250

Inspection discovers that the dead cactus reported earlier has come back to life and is sporting new growth!

June 30, 2019

Inspection discovers that the dead cactus reported earlier has come back to life and is sporting new growth!

Inspection discovers that the stain has failed at entry exterior wood beams structure

June 30, 2019

Inspection discovers that the stain has failed at entry exterior wood beams structure

This area takes full sun most of the day. The beams are equipped with metal top shields to prevent rot and damage from above. Failed stain means the expensive wood material is susceptible to deteriorating sun and rain damage. The entry beams were recoated with several coats of matching stain. Cost: $3500

Dog has accident on carpet

July 13, 2019

Dog has accident on carpet

Thankfully it was a throw rug and we were able to take it outside and wash it down!

Inspection revealed that the runs for the three horse stalls are not draining properly

July 15, 2019

Inspection revealed that the runs for the three horse stalls are not draining properly

An analysis of the material shows us that the wrong type sand was used. We had specified a large grain, washed, river sand. The material delivered was a crushed, softer material that breaks down quickly under horse pressure and clogs up the drain system.  We do not know who caused the mistake. The sand was removed and replaced with proper material.  Cost: $4200

Inspection finds that mites have killed a small tree planted a year earlier as part of the landscape project

August 16, 2019

Inspection finds that mites have killed a small tree planted a year earlier as part of the landscape project

The tree was removed immediately to prevent spread of the mites. A new tree will be found for the spot. Cost: Labor 1.5 hours plus tree budget of $250.

Inspection finds that the finish has failed on half dozen exterior sconce lights

August 16, 2019

Inspection finds that the finish has failed on half dozen exterior sconce lights

These are out of warranty and will need to be replaced. Cost: $1200

Inspection reveals that the horses have chewed on some posts in their stall runs

August 16, 2019

Note: All posts and wood surfaces have been protected by aluminum angle iron. In these areas the clever horse has found a way to get to the back side of two unprotected areas.  A long reach. The repair is minor and will leave as is in honor of the great effort expended to get to this exposed wood.

Inspection notes that caulking has failed along trim areas at the barn siding above and below the large side windows

August 16, 2019

Inspection notes that caulking has failed along trim areas at the barn siding above and below the large side windows

If not found early this is an area that could develop rot. Any failed caulking must be replaced immediately while the weather is hot and dry. Cost: 2 hrs labor and $45 material.

Inspection shows that the paint/stain on the big rear patio beams has failed just as it did earlier on the front beams

August 16, 2019

These are under a roof protection so they have lasted longer than the front entry stain, but will still need to be done soon.

Refinish covered patio beams

September 16, 2019

Refinish covered patio beams

These beams are large and require scaffold to work on safely, The cost to refinish all four was about $2500. they now look like new again and the wood was much less porous this time.

Siding joints look bad

October 18, 2019

Siding joints look bad

After a couple years we started to notice the caulking joints between the siding members starting to look bad.  Turns out the contractor did not do a good job cleaning the joints when they were installed.  Cost to repair $700

Ring Doorbell Dies

April 13, 2020

Ring Doorbell Dies

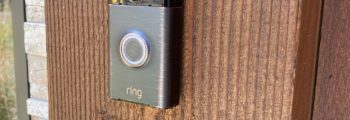
Ring doorbells are designed to work wirelessly using a rechargeable battery for power. That’s great except when the battery dies you have to remove the doorbell and recharge it. To get around that problem, you can run the normal bell wires from the door button location to a transformer in order to keep the battery charged all the time. We have now learned that a normal doorbell transformer will not work because they only put out 12-18 volts. Use only a 24vAC transformer. Ring sells transformers for

First cracks appear in concrete walks

May 15, 2020

First cracks appear in concrete walks

It took two years, but the first cracks finally arrived. It’s a very small “hairline” crack and considering there is over 10,000 square feet of slab, I consider this miraculous. Bravo to our concrete contractor!

Door gaskets deteriorated

June 25, 2020

Door gaskets deteriorated

Our exterior doors have a rubberish gasket at the bottom that helps seal out the weather. The gaskets are failing now after just two and a half years. Cost to replace $600

Cement backer board

The new kid under your tile 

To say that the home building industry adapts to changes in technology a bit slowly would be a vast understatement. Professional builders have to warrant their work, and they are also concerned about their reputation. As a result, they adopt new techniques only when they are fairly certain that the change won’t end up as a call back.

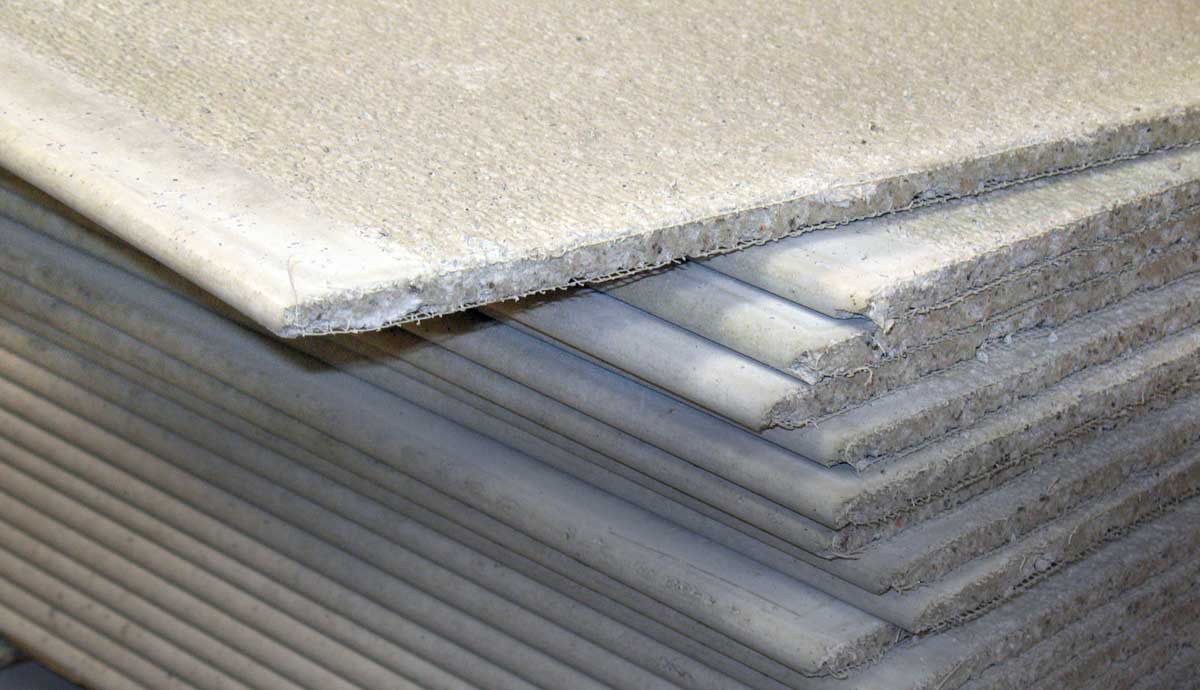
cement backer board
cement backer board

By building industry standards, Cement (backer) Board came onto the scene fairly recently. The first time I recall seeing it was in the mid 90’s when it appeared on the rack at one of our lumber yards. Cement board is a combination of concrete and reinforcing fibers formed into 3-foot by 5-foot sheets. These sheets are 1/4 to ½-inch thick and are typically used as a backing board for tile installations.

Cement board can be nailed or screwed across wood or steel studs. This creates a fast, really flat substrate for vertical floor tile or attached to plywood for stone or tile kitchen counters and backsplashes. It can also be used on the exterior of buildings as a base for exterior plaster (stucco) systems and sometimes as the finish system itself.

Cement board adds impact resistance and strength to the wall surface as compared to gypsum boards. Fabricating cement board in thin sheets allows bending for curved surfaces.

Thin set tile

Before cement board came along, many bathrooms in “tract” homes or spec-builds used a tiling method called “thin-set”. When it first got started, it was crap! Thin-set eliminated the traditional mortar layer beneath the tile. This saved time and material and required less skill. Thin-set was applied directly to a water-resistant version of gypsum sheetrock called “green” board because of its greenish color.

cement backer board options
Water resistant gypsum board


Unfortunately, “green” board did not resist impacts well nor did it stand up as a water-proof backing to the tile. Tile cracks, caulking or mortar failure could lead to water damage and sometimes mold.

Backer board makes Thin-Set tile acceptable

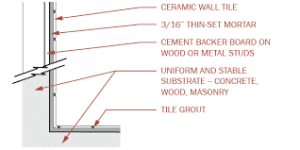
As a tile backing product, Cement Board has far better long-term performance than paper-faced gypsum core products. It is concrete after all, not gypsum. As a result, it will not mildew or physically break down in the continued presence of moisture or leaks. Also, cement board provides a stronger bond and support with tiles than typical gypsum board.  Cement Board has made thin-set tiling an acceptable building practice.

cement backer board
Thin set tile diagram

Tough but not waterproof

Cement board resists water damage but is itself not waterproof. It will actually absorb moisture, but it has excellent drying properties. In areas continually exposed to water like spray from showers, a waterproofing material is required behind the sheets, Plastic waterproofing sheets can be used or perhaps a trowel-applied liquid membrane.

Weight and installation

One major disadvantage of cement board is the weight per square foot. It is approximately twice that of gypsum board, making handling by one person difficult. Cutting of cement board must also be done with carbide-tipped tools and saw blades. Due to its hardness, and brittleness, pre-drilling for fasteners is recommended. Cement board is hung with corrosion resistant screws or ring-shank nails.

Cement board has very little movement under thermal stress. Still the boards are usually installed with a slight gap at joints in shower pans, bathtubs, and each other. These joints are then filled with silicone sealant  or the manufacturer’s taping compounds before applying a finish. Joints are taped like conventional gypsum board, but with fiberglass tapes that provide additional water resistance.

Summary

Combined with a water impermeable finish, cement board is a stable, durable backing board. Cement board is slightly more expensive than water-resistant gypsum board but will certainly provide better long term value.


Help me to help you

Thank you for taking time to use this free website. I hope you find the junk-free information here fun and useful? Please send me your comments and feedback.

Writing and maintaining the information in this manual is a lot of hard work. By sharing these pages with your friends, you help me to continue the effort.  You can easily share these pages to all your favorite social media sites via the shortcut buttons on the sidebar. You can also simply email the page link to your friends. Please share often.

The very best way to help me happens when you use the embedded links to buy things. Using a link is easy and free, yet it provides a great source of support for this site. The vendors I've chosen to link to have proven to be trustworthy and are the very best resources available. That is why I recommend them personally.

HomePreservationManual.com is the place to visit if you want information on

  • maintaining your home
  • how to improve air quality
  • ways to improve the real value of your home
  • what are the best housekeeping services
  • the problems with handymen services
  • how to plan and execute home renovation and home improvement projects
  • tips for spring cleaning; tidying up a messy house
  • and generally how to be a better homeowner.

Make sure you download your monthly maintenance checklist for this month.

Linking to this site

Do you want to link to anything on this site? Please do! Go right ahead. I appreciate it and am honored to be considered as a resource on your website. Always feel free to link to anything you find helpful. Of course, please never copy anything (everything is copyrighted and registered), but link away and thanks!

Thank you!

Copyright and permission to use information.

If you have questions or just want to say hi, please send me a note. If you are looking for help performing the work described and you are in the San Francisco area, go to HPS Palo Alto Inc.and request a free evaluation.

As a reminder, it is unlawful to make copies including cut and paste or especially in the form of making printouts for reuse. If you wish to make a print for personal use, I will happily grant you one-time permission if you will kindly send me a request in writing.

Thanks again!