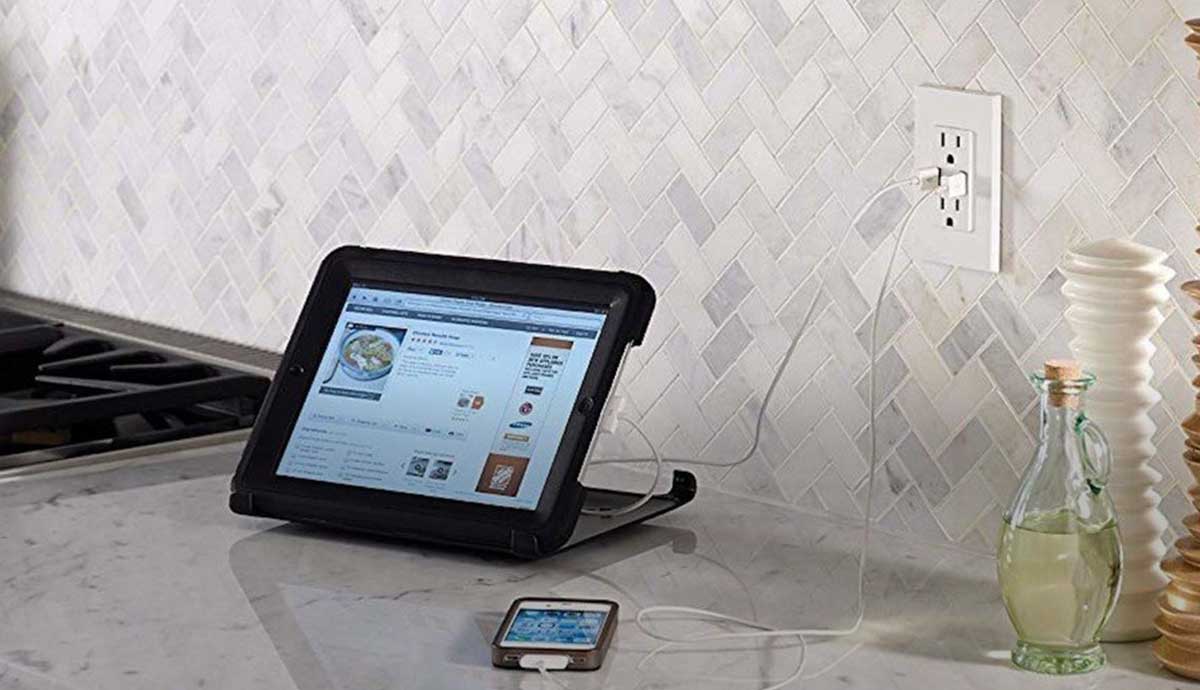
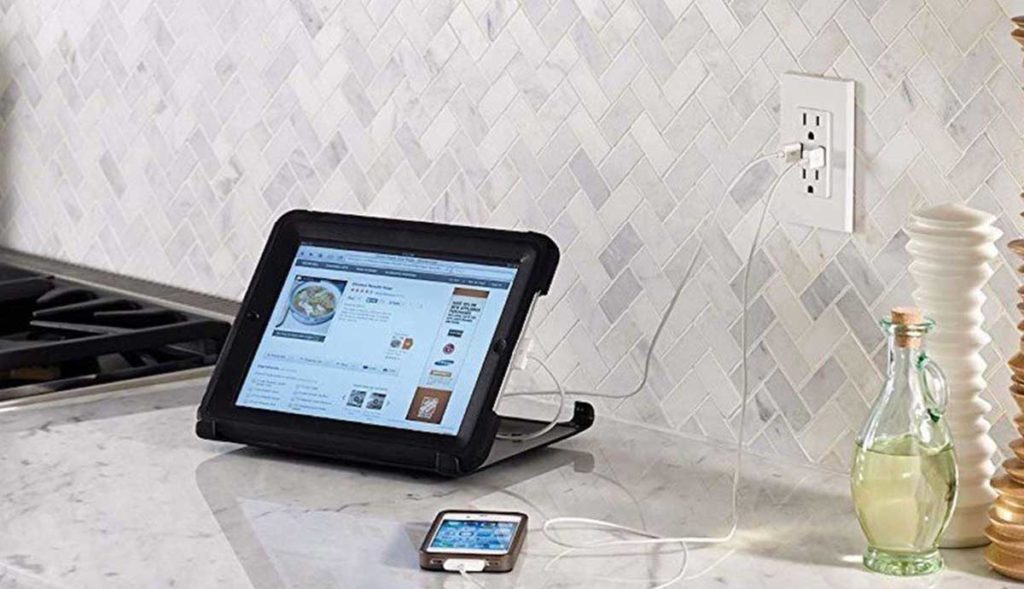
Install new Leviton USB outlets everywhere you want device chargers. Kitchen, office, living room, patios or anywhere! Convert any existing home outlet location into a fast-charging station with this powerful built-in smart chip technology.
The Type A and Type-C USB Device Charger/Tamper Resistant Receptacle (shown above) offers superior charging power for smartphones, tablets, laptops, monitors, printers and more. Two high powered vertical USB Ports, one Type A and one Type-C, deliver a combined total of 5.1A charging current and 25+ watts of power. Smart chip technology recognizes and optimizes the charging requirements of individual devices and the Type-C Port enables the cables to be inserted easily in either direction. The Type A and Type-C USB Charger/Tamper Resistant Receptacle is a powerful solution to help keep your devices charged with ease and style. Use your lightning cable and charge up to 60% faster.
Outlet Features
Smart chip recognizes and optimizes the charging requirements of individual devices including Apple, Samsung, Nexus, Pixel and more
Type-C Port provides up to 59% faster charging power over competition using Lightning cable on Type-C Port with iPhone 7, iPad Mini 1, iPad Pro 9.7
Combined total of 5.1 A charging capacity – Type-C Port can charge a maximum of 3 Amps and the Type A Port can charge a maximum of 2.4 Amps
Two high-powered charging ports with 25+ watts of power
Type-C Port permits the cables to be easily inserted in either direction
These outlets are also available in dual Type-C, and in six colors. Contact us at info@homepreservation.com for installation or more information.
Extension cords are common household items that almost everyone takes for granted. So I was surprised recently to learn just how dangerous extension cords can be. Inspired, I went home to check mine out. As I suspected, my cords were all ancient and ratty. It was time to head to our local “big box” to get replacements.
Confusing marketing
I was confronted by a wall of products at the store. So many that it stopped me in my tracks. The options were staggering. Adding to my confusion was heaps of mysterious and sometimes misleading information spread all over the packaging. Accordingly a new cord can be purchased in several versions including with a UL listing, 3-wire design, Multi-outlet, indoor only, outdoor weather resistant, 13amp, 1625 watt, 16/3, 125V, designer, basic, NEMA, reinforced blades, oil resistant, vinyl jacket and tangle-free. The cords were available in 3’,6’,10’, 12’, 15’, 25’, 50’, and 100’ lengths, and I could have them in white, brown, green, black, yellow, blue, pink, orange or red. Even pink.
I got to thinking that if I am having this much trouble buying an extension cord, how in the world is the average joe ever going to able to do it? So, in this post, I am going to take you through my learning process and explain a few important and surprising things I discovered about extension cords. Hopefully it will help you.
Safety first
Construction sites are dangerous places, so the US government Occupational Safety and Health Administration (OSHA) has established regulations to help make them as safe as possible. One area of concern is working around electricity. After falls, electrical related injuries are the second leading cause of accidental death at work. For this reason, has developed electrical safety procedures that prevent electrocution on the jobsite.
Homeowners can also benefit from these safety regulations. Let’s start with some simple OSHA best practices around extension cords. Since we all use extension cords at some time or another, these simple rules will help provide a much safer household for you and your family.
An extension cord waiting to become an accident
A lot of people consider extension cords as little more than objects of convenience. When we need one, most of us are in the habit of grabbing any cord available. Think back and you will probably remember times you used a cord with bent or broken prongs, exposed wires, missing ground plugs, or frayed jackets.
It is easy to overlook problems when in a hurry but we really need to think smarter about these products. Ignorance in this case can get you killed. Power cords are actually electrical tools. Tools that are used to provide a safe, flexible and extended high voltage electrical source for your power equipment. They need to be serviceable and in good condition.
Five OSHA Rules
Here are five really important OSHA extension cord rules you must learn and teach your family to follow:
Rule 1
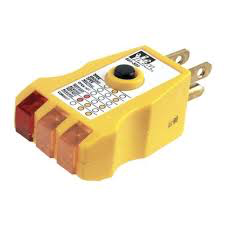
Only use extension cords with GFCI protection. GFCI stands for Ground Fault Circuit Interrupter and it will disconnect power if a potentially dangerous situation occurs. A GFCI compares current flowing through the cord and disconnects the power of there is a “leak” or imbalance of 4-6mA. GFCI’s are not expensive and can be real life-savers. I recommend using extension cords with built-in GFCI’s. Otherwise you must have a GFCI outlet or circuit to plug into. Be certain since not every outlet or circuit in your home is protected this way. If you are on a job site or some other area where certainty about GFCI protection is in doubt, you can simply use a cord like this with a “built-in” GFCI device.
Rule 2
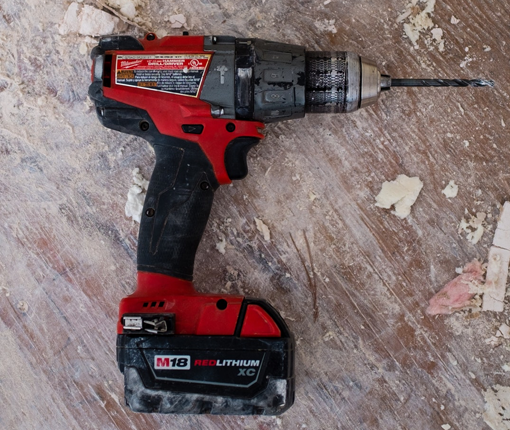
Use only one cord per tool up to 100 feet in length. Do not exceed 100’ feet. If a project requires more than 100 feet in distance, a temporary power distribution box will need to be installed. Never plug one extension cord into another. This mistake can lead to fires, equipment failures and electrocution. A cords’ power ratings vary by wire size and length. Plugging two cords together reduces their current capacity in half which will result in voltage drop and overheating. Purchase heavy duty cords with 10-12 gauge wire. This avoids worrying about voltage drop problems. This gauge wire will handle any of your power tools without problems even at 100’ lengths. Forget about buying or using cheaper cords made with smaller gauge wire.
Rule 3
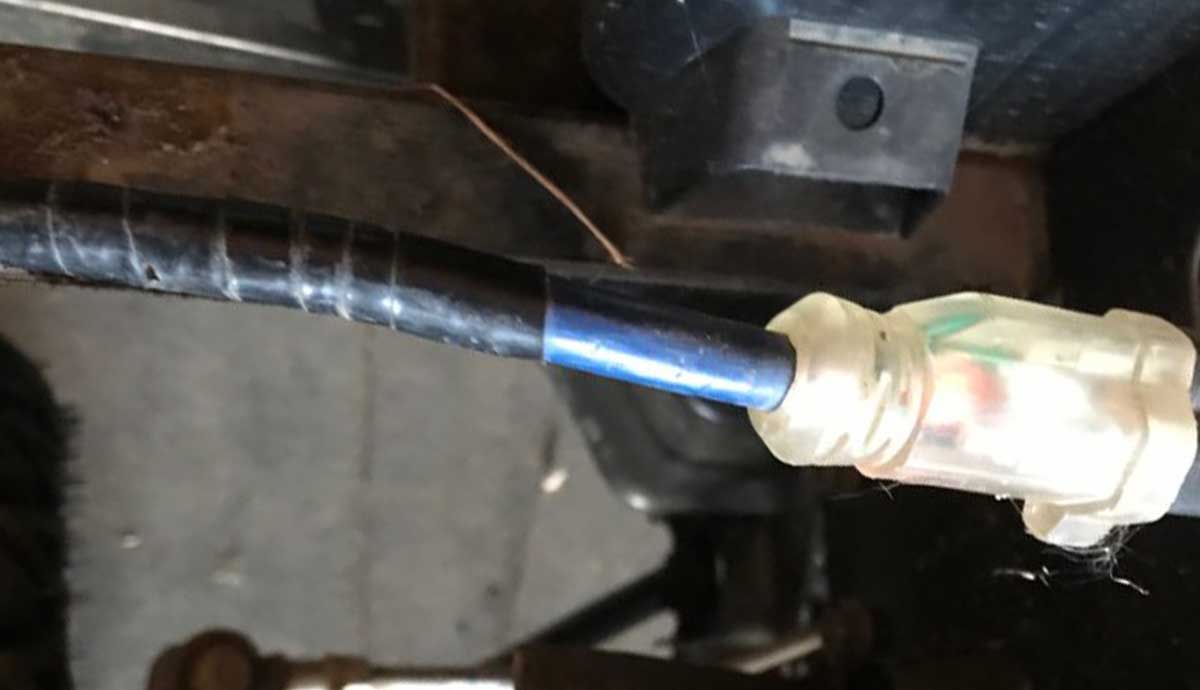
Do not use a damaged cord. A damaged and repaired cord is easy to spot as it will likely have tape on it. The cord may still work, but it is a violation of the OSHA regulations. Do not patch damaged extension cords. The only acceptable repair to a damaged cord is to cut off the damaged area and install a new male or female end. This may shorten the cord, but is safe and acceptable. Take care to protect you cords. It is easy to damage them by dropping tools or materials on them, by driving over them or pinching or kinking them.
Repaired extension cords are a no-no
Rule 4
Do not secure extension cords to walls or ceilings using metal nails or staples. Metal fasteners can easily damage the relatively soft flexible jacket of the cord. Slight impacts, pinching or bending can damage the cord. Even pulling on the cable can wear through the jacket accidentally.
Rule 5
Do not run cords through doorways or under rugs. This rule helps avoid two causes of problems: trips/falls and traffic damage to the cord. Lay the cords around the edges. Avoid laying cord across the room. Use cord protectors if they are exposed to any kind of traffic or abuse.
For work get a 50’ or 100’ 12-gauge cord with a built in GFCI. An illuminated end feature can save a 200’ walk to and from the receptacle to check for power. Get a cord with high quality terminations (ends) and a heavy-duty protective jacket. Keep your cords safe. Don’t allow heavy objects to run over them and store them properly when not in use. Forget clever and expensive coiling and storing products. Learn from Dirt Farmer Jay how the pro’s coil and store extension cords… https://youtu.be/eTpbh2zJGhA
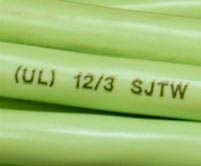
Cords are rated for hard or extra-hard usage per the National Electrical Code. The ratings must be indelibly marked along every foot of the cord. Examples of these codes are: S, ST, SO, and STO for hard service, and SJ, SJO, SJT, and SJTO for junior hard service.
GFCI’s help keep you safe, but don’t last forever!
It is always a bit frightening to learn that something meant to make your life safer has a deadly dark side. Today’s surprise villains are GFCI protected outlets… and they are everywhere. These outlets are a mandated part of your home electrical system and are designed to keep you safe from shock. They do a great job too, as long as they are working. Unfortunately, GFCI’s can silently fail leaving your life at risk. Regular service as described here can reduce the risk of failure, but most homeowners will never know, because although GFCI’s are mandated, proper maintenance is not.
Pop-up GFCI outlet
Purpose of GFCI
GFCI stands for Ground Fault Circuit Interrupter. These are special electrical outlets in your home that stop the flow of electricity if any abnormal current flow takes place. Their purpose is to prevent a possible electric shock.
Starting in 1971, the electrical codes have required you to have GFCI outlets in your kitchen, around the backsplashes, and in each bathroom in your house. They are required in any potentially wet location. Also, any exterior outlets around your house, are required to be connected to a GFCI-protected circuit.
Types
There are two types of GFCIs. GFCI “circuit breakers” and GFCI “receptacles”. GFCI receptacles are used extensively inside the house where they are safe from weather and easier to reset. Circuit breaker types work better for protecting exterior outlets since they can be better sheltered in a service panel. The main disadvantages of GFCI circuit breakers over receptacles are cost and inconvenience (resetting). The advantage is circuit breaker types will typically outlast GFCI receptacles as they are not exposed to the rigors of the outdoors.
Most homeowners have had to “reset” a GFCI outlet at some point? You can do this by pressing the RESET button after it has tripped. GFCI’s can sometimes trip because of power surges, electrical storms, or just by overloading the circuit. The fact is, unless they have tripped, you probably don’t really think much about them. That could be a dangerous error.
How GFCI’s Work
A normal 120-volt outlet in the United States, has two vertical slots and then a round hole centered below them. The left slot is slightly larger and is the “neutral,” the right slot is the “hot”. The hole below them is called the “ground.” If an appliance is working safely, all electricity that it uses will flow from hot to neutral in exactly equal amounts.
A GFCI outlet monitors that current and if there is any imbalance in the flow, it trips the circuit. The GFCI senses any mismatch (as small as 4 milliamps,) and interrupts the circuit almost instantly (one-thirtieth of a second.) These specs are important because at around 10 milliamps, human muscles will lock up from electrical shock, making them unable to release whatever is causing the shock. Just two seconds of sustained current can cause death.
Mechanics
GFCI breakers w/blue test buttons
When the reset button is pressed, the spring-loaded contacts close, allowing current to pass. An internal solenoid connected to a sensing coil keeps the contacts closed.
The sensing coil surrounds (but is not electrically connected to) the hot and neutral conductors. In normal operation, the current moving down the hot conductor returns up the neutral conductor and the currents are equal and opposite and cancel each other out.
Any fault to ground, caused for example by a person touching a live component in the attached appliance, will cause some of the current to take a different return path, creating an imbalance in the current flow.
This imbalance causes a current in the sensor coil which then releases the spring-loaded contacts and cutting off the electricity supply to the appliance.
All this happens in milliseconds, greatly reducing the chances of a dangerous shock being received.
The test button allows the correct operation of the device to be verified. This simulates a fault by creating an imbalance in the sense coil. If the GFCI does not trip when this button is pressed, then the device must be replaced.
GFCI Outlet Service Life
GFCI outlets don’t last forever. This means that some of yours may no longer be protecting you as they should. Functional GFCI outlets likely save thousands of lives every year by preventing electrical shocks from wet hands, improper use of extension cords, touching bare exposed wires etc. But only if they are working.
The average GFCI outlet has a service life of only 10 years. If your home is older than that, there’s a good chance that at least some of your GFCI outlets aren’t working properly. If your area is subject to corrosion, high humidity and/or frequent storms or power surges, it is possible for GFCI outlets to become non-functional in 5 years or even less.
Compounding the problem, contractors and developers often buy GFCI’s in bulk which usually nets the most cheaply made units on the market. Using higher quality receptacles will give a longer life span so buy specification grade, commercial grade, or hospital grade. These are much higher quality GFCI’s for just a few dollars more.
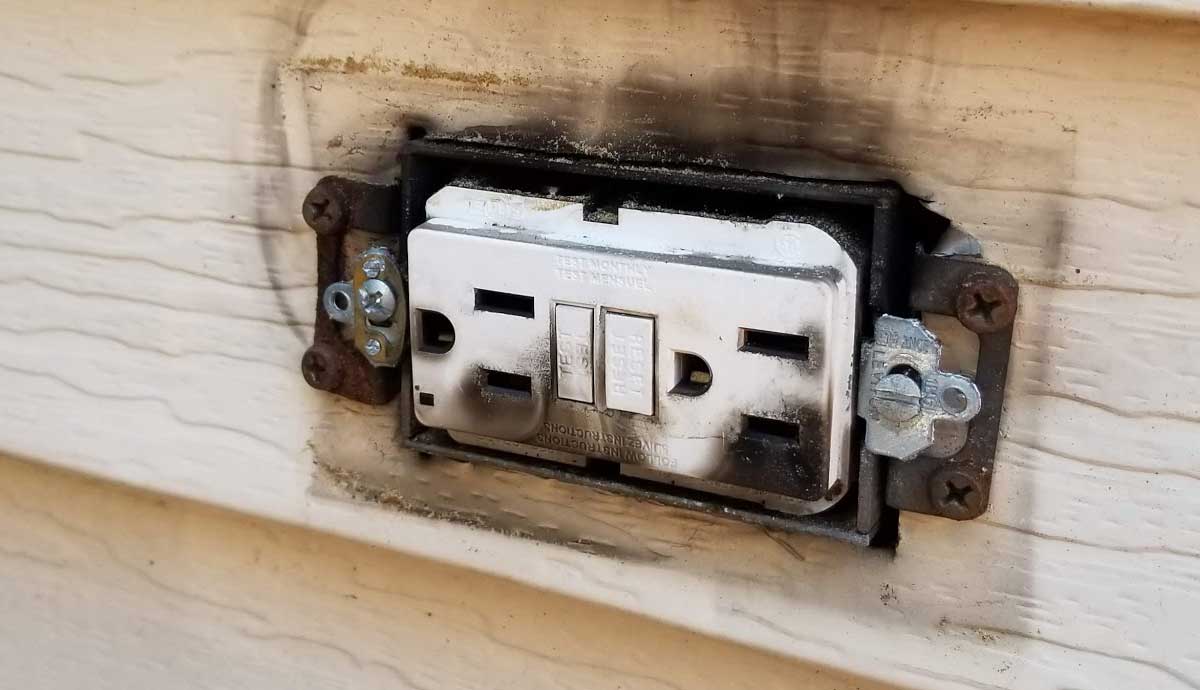
Testing your GFCI
Failed GFCI outlet
The best way to see if your GFCI outlet is still doing its job is to test it. To do so, the outlet must be powered up. An unpowered GFCI outlet can’t be tested, and it won’t allow you to reset it until it’s powered.
The simplest way is to press the TEST button on the outlet. Doing this creates a fault to ground and interrupts the flow of electricity. This in turn pops out the spring-loaded RESET button. You can then press the RESET button to reconnect the circuit and resume normal operation. Common GFCI outlets have a red TEST button and a black RESET button, though newer outlets may look different.
Press the TEST button and if the GFCI doesn’t trip, replace it as soon as possible. If your test causes the outlet to trip but the RESET button won’t reset, that means it needs to be replaced (it probably wasn’t protecting you anyway). A GFCI outlet can’t be reset if it’s not getting power so check that the breaker isn’t tripped before deciding that the GFCI outlet is faulty.
You should test your GFCI outlets ay least quarterly. It’s extra work, but it really could save your life.
Outlet Testers
The best way to test a GFCI outlet is with a device that actually creates a ground such as this Triplett Plug-Bug:
GFCI outlet tester
I get them for my entire crew here for under $7 on Amazon. Just plug it into the outlet, press the button on the tester and see whether your GFCI outlet trips. Testers like this one have Indicator lights to show whether any outlet (GFCI or standard) is wired properly. It can identify common problems like an open ground, open neutral, open hot, or reversed wires. Sometimes an outlet will not look like a normal GFCI but the when tested the circuit will go dead. In that case you either have a GFCI breaker in the main panel, or the outlet you tested is “downstream” from another GFCI outlet located somewhere else. If so you will need to search for the breaker or outlet and reset.
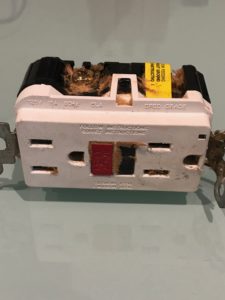
Replacement Protocol
There is no way to take outlets apart to make repairs. If they are found to be defective they must be replaced. Here is the replacement protocol HPS recommends to their clients: Use a tester to check and verify GFCI operation every quartier. For the first five years replace one at a time as needed. After five years when one fails, replace them all.
I save money by buying high quality GFCI outlets in quantities. I recommend these 15A GFCI outlets by Eaton. Eaton makes great quality products but what I really like is that these GFCI outlets do a regular self-test. A blinking red LED indicator means they’ve reached the end of their service life and need to be replaced. If you don’t have HPS. or can’t remember to manually test your GFCI outlets regularly, using these self-testing versions are a good option. NOTE: Make sure when ordering to match color with your existing outlets and switches.
Safety First
Testing your own GFCI outlets is definitely something any homeowner can (and should) do. Replacing a GFCI outlet that has reached the end of its service live is something average homeowners should leave to a professional licensed electrician. If you ignore this advice, just know that with any electrical work, it’s important to follow safety procedures such as shutting off the circuit at the breaker and testing all wires in an outlet box before touching anything. This is particularly important in boxes that contain more than one outlet and/or switch. Never assume that a wire is dead. Always use an electrical circuit tester before touching anything. If you don’t have one, you can get a circuit tester in a set with a GFCI outlet tester for less than $15. These are good tools that every homeowner should have.
Summary and Recommendations
GFCI outlets wear out and fail after a few years much like smoke and CO detectors. It is highly likely that some of your GFCIs have failed or are way past their intended service life. With your own tools, you can safely test your GFCI outlets. Have a licensed electrician replace any failed outlets. Another problem to avoid is locating a master GFCI (a GFCI controlling a number of non-GFCI outlets) in a closet or some other difficult to find location. These can be time consuming and frustrating to find when tripped.
History of GFCI code changes
Various GFCI code enactments:
1971 Receptacles within 15 feet of pool walls
1971 All equipment used with storable swimming pools
1973 All outdoor receptacles
1974 Construction Sites
1975 Bathrooms, 120-volt pool lights, and fountain equipment
1978 Garages, spas, and hydro-massage tubs
1978 Outdoor receptacles above 6ft.6in. grade access exempted
1984 Replacement of non-grounding receptacles with no grounding conductor allowed, pool cover motors and distance of GFCI protection extended to 20 feet from pool walls
1987 Unfinished basements, Kitchen countertop receptacles within 6 feet of sink, Boathouses
1990 Crawlspaces (with exception for sump pumps or other dedicated equip.)
1993 Wet bar countertops within 6 feet of sink
1993 Any receptacle replaced in an area presently requiring GFCI
1996 All kitchen counters – not just those within 6 feet of sink, All exterior receptacles except dedicated de-icing tape receptacle, Unfinished accessory buildings at or below grade
1999 Exemption for dedicated equipment in crawlspace removed
Thank you for taking time to use this free website. I hope you find the junk-free information here fun and useful? Please send me your comments and feedback.
Writing and maintaining the information in this manual is a lot of hard work. By sharing these pages with your friends, you help me to continue the effort. You can easily share these pages to all your favorite social media sites via the shortcut buttons on the sidebar. You can also simply email the page link to your friends. Please share often.
The very best way to help me happens when you use the embedded links to buy things. Using a link is easy and free, yet it provides a great source of support for this site. The vendors I’ve chosen to link to have proven to be trustworthy and are the very best resources available. That is why I recommend them personally.
Do you want to link to anything on this site? Please do! Go right ahead. I appreciate it and am honored to be considered as a resource on your website. Always feel free to link to anything you find helpful. Of course, please never copy anything (everything is copyrighted and registered), but link away and thanks!
Thank you!
Copyright and permission to use information.
If you have questions or just want to say hi, please send me a note. If you are looking for help performing the work described and you are in the San Francisco area, go to HPS Palo Alto Inc.and request a free evaluation.
As a reminder, it is unlawful to make copies including cut and paste or especially in the form of making printouts for reuse. If you wish to make a print for personal use, I will happily grant you one-time permission if you will kindly send me a request in writing.
Thanks again!
Help me to help you
Thank you for taking time to use this free website. I hope you find the junk-free information here fun and useful? Please send me your comments and feedback.
Writing and maintaining the information in this manual is a lot of hard work. By sharing these pages with your friends, you help me to continue the effort. You can easily share these pages to all your favorite social media sites via the shortcut buttons on the sidebar. You can also simply email the page link to your friends. Please share often.
The very best way to help me happens when you use the embedded links to buy things. Using a link is easy and free, yet it provides a great source of support for this site. The vendors I've chosen to link to have proven to be trustworthy and are the very best resources available. That is why I recommend them personally.
Do you want to link to anything on this site? Please do! Go right ahead. I appreciate it and am honored to be considered as a resource on your website. Always feel free to link to anything you find helpful. Of course, please never copy anything (everything is copyrighted and registered), but link away and thanks!
Thank you!
Copyright and permission to use information.
If you have questions or just want to say hi, please send me a note. If you are looking for help performing the work described and you are in the San Francisco area, go to HPS Palo Alto Inc.and request a free evaluation.
As a reminder, it is unlawful to make copies including cut and paste or especially in the form of making printouts for reuse. If you wish to make a print for personal use, I will happily grant you one-time permission if you will kindly send me a request in writing.

 Smart chip recognizes and optimizes the charging requirements of individual devices including Apple, Samsung, Nexus, Pixel and more
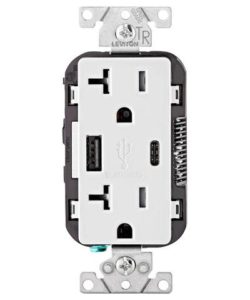 Smart chip recognizes and optimizes the charging requirements of individual devices including Apple, Samsung, Nexus, Pixel and more