Home Reviews

Outdoor-Rated Appliances And Why you Need Them.

Entertaining outdoors at home is more fun and exciting than ever. And thankfully it’s not all about pools anymore! Outdoor living has become an all year activity.

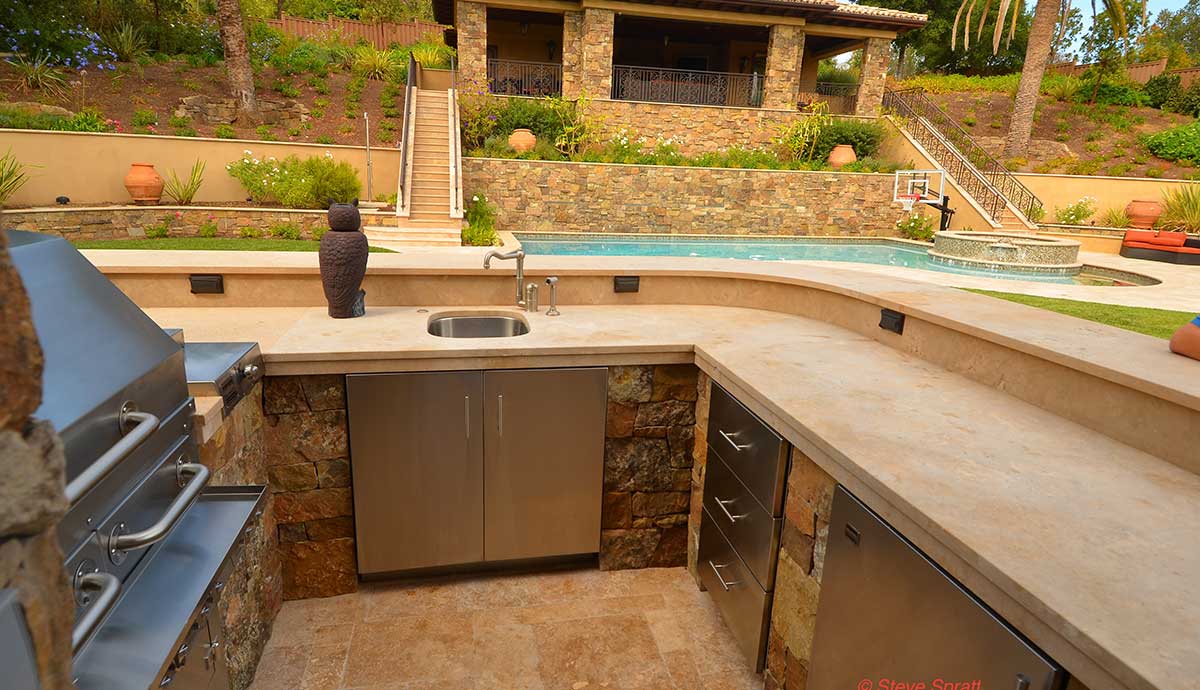
Today’s back yard experience centers more around food and drink. And homeowners love kitchens.  As a result, pizza ovens, elegant BBQ’s and patio heaters are now the dream features for the average back yard. Even wine and tiki bars are coming back!

Outdoor rated appliances
Outdoor rated refrigerator

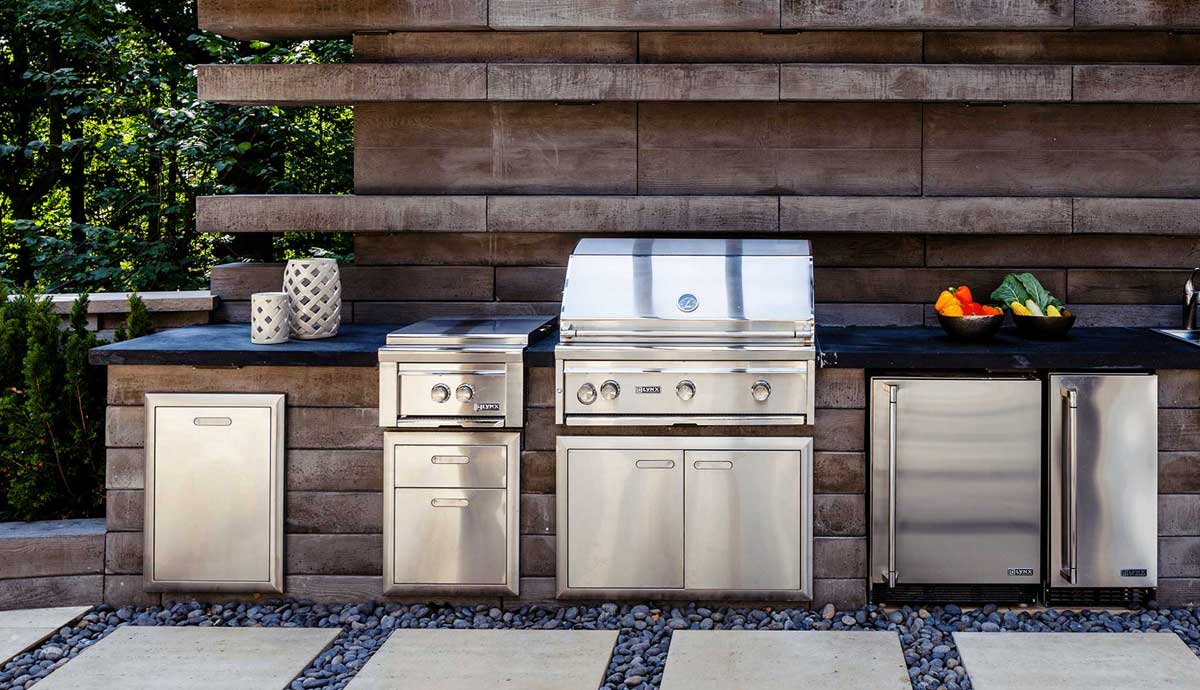
Patio cooking for family and friends has become a central event for many homeowners. And of course, good cooks demand every convenience. Disposals, dishwashers, refrigerators, ice machines, coffee makers and microwaves are needed. And since the entertaining and cooking tasks have moved outdoors. The need for outdoor-rated appliances has become important.  

Harsher conditions

The outdoor environment is much harsher than indoors.  And any appliances placed permanently outside are going to have to endure some bad weather. Everything from widely changing temperatures, fluctuating humidity, fog, sun, dust and wind will all attack any equipment outside. And insects and animals will certainly find your outdoor kitchen appliances to be a cozy place to raise a family.  This is why every patio kitchen needs outdoor-rated appliances.

Tougher specifications

Outdoor-rated appliances have been specially designed for outdoor use and are tougher and more durable than indoor units. They are more corrosion resistant and have protected wiring and plumbing. The exteriors are sealed to keep out gnawing rodents and nesting insects. And outdoor rated equipment also has better insulation and moisture protection. Especially for the electronics. They are essentially “hardened” to the outdoor environment.

Every manufacturer has different specifications. Meaning some are tougher than others. So be sure to check them carefully before buying.

Prices

All this “hardening” comes at a cost. As a result, prices for outdoor-rated appliances are a bit higher than their indoor counterparts. Fortunately, they also appear to come with better warranties. Some are even advertised with limited lifetime guarantees. Despite the slightly higher costs, preventing a rat from living in your pizza oven or chewing up your refrigerator is affordable peace of mind.

Availability

Outdoor rated appliances
Outdoor rated dishwasher

Specialty outdoor-rated appliances are available over the web from BBQ Guys and can be shipped to you in just a few days.  Some of the appliances currently available with “outdoor” ratings include:

  • Cooktop burners
  • Ventilation hoods
  • Dishwashers
  • Refrigerators
  • Freezers
  • Ice makers
  • Warming drawers
  • Pizza ovens
  • Sinks and bar faucets
  • Wine coolers
  • Televisions (SunBrite and Sealoc make products in 4k up to 75 inches. 

Check out BBQ Guys Outdoor Kitchens at BBQGuys.com!

I could not locate true “outdoor-rated” small appliances like microwaves or coffee makers. But many were available in a “marine” grade. The drawback to marine grade appliances is they have different dimensions and voltages making them less suitable for home use.  The point is basically moot anyway. The portability of small appliances like coffee makers, toasters, blenders etc. makes them easier to move indoors when not in use. And their low cost makes them less painful to replace if you don’t.

Summary

If you want your outdoor kitchen equipment to last longer than a week or two, you need outdoor-rated appliances. Normal appliances will not survive long outdoors, and doing so will void the manufacturer warranty.  If you are putting together a quality outdoor kitchen, don’t make the mistake of using the wrong kind of appliances.

Be sure to read my article on “outdoor kitchen mistakes to avoid.”

Pre-finishing a wood deck

Pre-finishing a wood deck
Boardwalk deck

Over the last year I’ve posted a number of articles on wood deck construction. If done well, wood decks can be beautiful, permanent extensions of your home’s living space connecting the outdoors. They can also become outdoor kitchen and BBQ areas. I have a special interest in wood decks because witnessing their premature failure was one inspiration for this website.

Unfortunately, many decks are built almost as afterthoughts and not designed or constructed to endure the punishing elements they will be subjected to. As a result, too many wood decks (some  constructed with very dear materials) end up in the land fill before their time.

Battling the elements

The deck’s protective coating is it’s first line of defense in battling the elements. In this post I’d like to show you how to apply a finish to a new wood deck during installation. Installation is the best time to apply the first coats of finish because it is the only time you will ever have complete access to all six sides of the decking boards. You’ll only get one shot at this so take your time and do it right. 

IPE

In this example we are preparing to install IPE material. I love IPE because it is absolutely gorgeous. It is also insect resistant, hard wearing and stable (very dense, few twists, knots, splits etc.).  All these things of course make it very desirable and expensive. It is also a rainforest product. And even though we only use FSC certified lumber, I still feel IPE deserves special treatment and honor by only using it in the most well planned and executed applications.

Pre-finishing a wood deck
IPE decking
IPE Oil


One drawback to IPE is that it will require re-coating the surface finish every 18-24 months to in order to maintain the rich color. If not recoated the surface turns a weathered gray color much like teak.  Applying a good finish to begin with makes subsequent applications much easier. We use IPE Oil purchased here from Amazon. If we need to add color (this is sometimes needed for follow up applications) we can use Sikkens stain products also available here from Amazon.

Process

I’ve included a video here of the initial stain and finish process. This was a large installation so the crew set up a system to handle long pieces in high volumes. Even with all the people and infrastructure in place it is a slow process to handle and put the first coat on these boards.  The process goes like this:

  1. wipe each board clean and sand all sides and remove dust.
  2. place in dip tank to soak for 5 minutes.
  3. work the oil solution into the grain and grooves with brush.
  4. wipe off the excess oil.
  5. stack the finished boards on “finished” stickers for drying and eventual use.
  6. Once the boards are installed, they will be sanded again and a final coat will be applied and wiped down.
  7. Be sure to store any oily rags in a sealed, water-filled can of water to avoid a fire.

Before the finish process, these boards were pre-grooved on site. The grooves are used to accommodate the invisible Tiger Claw fastener system that attaches the planks to the structure. This hardware leaves the surface blemish free. If y0u like a surface free of fasteners, the Tiger Claw product can be had here at Amazon.

If you are reusing older boards or using brand new boards that have aged or become dirty you will need to clean them first. Do this by washing and scrubbing them with a deck cleaner material and rinse, followed by a wood brightener.

Drying

Stacking the material and allowing it to completely dry is important. This way the material can be handled easily during installation. The drying rack stickers must also be finished with IPE Oil because raw wood stickers will absorb the finish from the boards and leave permanent unattractive white lines on them. Wood decking must be sealed on all sides including the cut ends of every board. End sealing is especially important for pre-finishing a wood deck with IPE lumber.

pre-finishing a wood deck
Pre-finished deck boards on drying rack
Pre-finishing a wood deck
Sanded deck prior to final coat


Prefinishing your deck boards will add years of life to the end product and reduce the regular maintenance time considerably.  Special thanks to ProStaff Painting in San Carlos CA for their help with this project.  

Do you have a wood deck project coming up? Feel free to contact me directly if you have any questions?

Construct your wood deck to last a lifetime.


Deck with rodent proof skirt
IPE deck

If you are going to take the time and expense to build a wood deck, why not do it right? Here are some tips for highly durable deck building.

In order to withstand years of exposure to the elements, decks must be made with some very durable materials. A typical deck will have a structure of concrete piers, preservative treated posts, girders and joists. All this will be held together with galvanized or stainless steel bolts and brackets. In addition, deck surfaces must be hard wearing, durable, and attractive.   

Good materials mean higher costs per square foot. Often outdoor decks actually cost more than other types of floor framing in the home. When materials cost more, then the design and the construction should be equal to the job too. If you are in a wildfire zone, make sure you follow the local fire departments guidelines to help prevent potential embers from spreading under your deck. 

A quality deck installation

Here are before and after photos, and a time lapse video of the construction of a new IPE deck system. This deck was designed and built to live up to the durability of the rare and expensive materials used. For instance, great care was used to prepare and construct the substructure (usually the first part of a deck to fail) for long life. Also, the design of the under side of the deck must allow for good drainage and ventilation, yet prevent rodents, insects and other animals from taking up residence there.

Wood deck construction
Deck screening and ventilation
Wood deck construction
Wood deck continuous footing

Maintenance will be needed

Wood decks must survive the most punishing treatment in the home. They must survive sun, rain, snow, ice, wind, pets, people, deck furniture, falling leaves, insects and sometimes potted plants. Even the best materials and workmanship will not live up to exposure like that for long. Good maintenance of your deck is advised on a regular basis. Services consist of an annual inspection, resetting of any loose fasteners or railings, sanding and refinishing any splitting or splintering and a new coating of preservative when it appears to need it.  IPE, redwood and cedar all weather well and will last a long time. They will last longer and look better with a refinishing every few years.

Summary

A good deck should never be an after-thought. Plan your deck as a permanent part of your home. Design it for durability and use quality materials and the best workmanship you can afford.  You won’t regret the investment in quality wood deck construction. 

Outdoor Kitchen Mistakes Homeowners Must Avoid


Homeowners avoid these outdoor kitchen mistakes
Outdoor kitchen mistakes to avoid

Last year a new client came to HPS to enroll a gorgeous new contemporary home into our Stewardship program. During our start-up inspection we were startled to find a BBQ island on the back patio that had caught fire and burned.  When asked about the fire our client reported that during his first cookout, the island had simply burst into flames. The expensive stainless BBQ was ruined, and its supporting base cabinet was a total loss too.

The original developer/contractor had disappeared, so our client asked us to fix it.  During the repair we uncovered a number of construction mistakes that ultimately led to the fire. I’ve shared these mistakes below to help future outdoor kitchen installers avoid similar results. Homeowners can add more value and enjoyment to their home by following these tips:

    1. The installation did not include an insulated BBQ liner/jacket

      Every built-in BBQ, especially if the counter boxes are built with a combustible material, should be installed with an insulated metal grill liner. This is a kind of protective metal jacket for your grill. Many outdoor kitchens have gone down in flames solely because an insulated grill jacket was not installed with the grill.

      Insulated grill jackets surround the BBQ and prevent heat from transferring into the cabinet structure. These devices will prevent any melting, burning, warping or fires. The jackets also provide the additional benefit of supporting and protecting your grills undercarriage from premature weathering and corrosion.

      outdoor kitchen mistakes to avoid
      Insulated BBQ jacket

      Many designers leave these protective liners out of the plans either because they don’t know about them, or they dislike their appearance. Cumbersome looking or not, they are an absolute necessity when building your outdoor kitchen with or without any combustible materials.

      Installing an insulated grill jacket will ensure your outdoor kitchen will last for many years of cookouts. NOTE: Not all BBQ brands offer these protective liners for their appliances. Make sure you purchase your grill from a brand that does, or plan to have one custom made for your application.

    2. The BBQ cabinet box was not fitted with vent panels.

      Outdoor kitchen mistakes to avoid
      BBQ cabinet vent panels

      When using a natural gas or propane BBQ, the enclosure cabinet must be properly vented to prevent an accidental explosion. During construction, the proper placement of the vents is critical. Install vent panels every four feet along the length of the structure to prevent any possible leaking gases from building up.

      The type of gas you are using will dictate where each vent panel is installed on the cabinet. If using natural gas (NG), make sure to install each vent panel as high as possible on the body of the island because natural gas rises. When using propane (LP), make sure to install the vents as low as possible on the cabinet since propane is a heavier gas that sinks. 

      Always use a licensed contractor who knows the codes for natural gas and propane installations. You might save a few bucks by attempting to do this yourself, or leaving out the proper vents entirely. But you could also end up having to replace your entire outdoor kitchen, or home, or possibly seriously injuring someone.

    3. Cabinet drawers blocked access to the plumbing

      Eight BBQ mistakes to avoid
      Outdoor BBQ cabinet drawers

      Having drawers in your outdoor kitchen cabinets can be very useful, but always consider the placement layout beforehand. Many outdoor kitchen owners  purchase drawers units for the cabinets, then realize they need to have access for plumbing. This is also a common issue with grills because the gas or propane plumbing requires access.

      When planning your outdoor kitchen, think carefully about the placement of your doors and drawers, and whether or not you can install appliances in the given space. Instead you may just want to use access doors that open into the existing void space of the island structure.

    4. Make sure the cabinet and appliances are outdoor rated.

      When equipping your outdoor kitchen, buy only appliances that are rated for exterior use by the manufacturer. Outdoor units are “hardened” to insure safety and durability when exposed to harsh weather. Indoor appliances are just not up to an environment that may subject it to humidity, heat, cold, blowing sand, rain, rodents and sunshine. In very short order, using indoor appliances outdoors will lead to problems. The appliances finish will become discolored or the unit may fail completely. You can be assured that your warranty will be nullified. It is also a good idea to order a custom cover for the entire countertop. This will protect it from the elements when not in use or during the off-season.


      Outdoor cabinets and enclosures also need to be constructed ideally of steel or concrete in order to remove the possibility of dry rot, fire or rodent access. You can order pre-fabricated outdoor kitchen cabinets from Amazon here.  Or here.

      Outdoor kitchen mistakes to avoid
      Make sure you have one of these
    5. Never install your cooking and cooling appliances next to each other.

      When designing an outdoor kitchen always separate the cooking appliances from the cooling appliances. Never install a refrigerator directly underneath or adjacent to your grill. Excessive heat means the refer will have to work much harder than it should. Overheating the internal parts can easily become a cause for them to fail sooner. If space is tight, install your refer at least one foot from your grill or side burner. Make sure a solid barrier is placed between the two appliances inside the island structure. A good layout will help your appliances operate at a reasonable temperature and as a result, last longer. 

      For safety purposes, design to prevent people from using the refrigerator with close exposure to the hot grill, either directly, next to, or above them.

    6. Know your appliances dimensions before making cut-outs.

      It is frustrating and expensive to have your cabinet spaces or countertops pre-cut for your appliances, only to find out they do not fit when it’s time to install them. Double and triple check the exact dimensions for the built-in pieces before making any cuts. If possible, it is always best to have the actual products on-hand to measure them for accuracy and a good fit. If you are using a stone slab countertop make sure the top fabricator templates the area just like they would for the kitchen. The rule of “measure twice and cut once” is especially important when working with stone.

      Outdoor kitchen mistakes to avoid
      Countertop cut too large for the BBQ-this allows debris to fall in creating fire risk
    7. Don’t forget to leave some extra counter space.

      Like most homeowners, you likely want to deck out your new outdoor kitchen with all sorts of appliances, for all kinds of cooking drink mixing and entertaining. However, not many appliances actually are rated for outdoor use. Mixers, coffee makers, microwaves etc. can all be ruined by a surprise rain, an errant sprinkler or even a heavy dew.  So don’t leave these non-rated appliances outside.

      Also, in all the excitement don’t forget the importance of empty counter space. It is best to leave plenty of empty counter space for things like food preparation, serving, eating and staging. When designing your outdoor kitchen, make sure you leave plenty of work space on the countertop for easy and convenient use.

    8. Do your research and choose reliable appliances

      There are tons of outdoor appliances on the market and it can be hard to choose the perfect products for you. Everyone wants great looking and functional appliances, but the important characteristic is durability. For that reason, its most important to do your homework before buying. An outdoor kitchen is something you want to last for many years, so it is crucial to select the perfect appliances when building.

Summary

Avoid the mistakes discussed above when designing your outdoor BBQ kitchen.  Take time creating a good appliance layout.  Read over any available customer and expert reviews. Research how well the appliance performs and only select products that are made for the outdoors. By doing your research beforehand, you will be much happier with your choices in the years to come. See How to Buy a BBQ. Contact me at info.homepreservation.com if you would like more information about planning and and constructing a quality outdoor kitchen area.


Help me to help you

Thank you for taking time to use this free website. I hope you find the junk-free information here fun and useful? Please send me your comments and feedback.

Writing and maintaining the information in this manual is a lot of hard work. By sharing these pages with your friends, you help me to continue the effort.  You can easily share these pages to all your favorite social media sites via the shortcut buttons on the sidebar. You can also simply email the page link to your friends. Please share often.

The very best way to help me happens when you use the embedded links to buy things. Using a link is easy and free, yet it provides a great source of support for this site. The vendors I've chosen to link to have proven to be trustworthy and are the very best resources available. That is why I recommend them personally.

HomePreservationManual.com is the place to visit if you want information on

  • maintaining your home
  • how to improve air quality
  • ways to improve the real value of your home
  • what are the best housekeeping services
  • the problems with handymen services
  • how to plan and execute home renovation and home improvement projects
  • tips for spring cleaning; tidying up a messy house
  • and generally how to be a better homeowner.

Make sure you download your monthly maintenance checklist for this month.

Linking to this site

Do you want to link to anything on this site? Please do! Go right ahead. I appreciate it and am honored to be considered as a resource on your website. Always feel free to link to anything you find helpful. Of course, please never copy anything (everything is copyrighted and registered), but link away and thanks!

Thank you!

Copyright and permission to use information.

If you have questions or just want to say hi, please send me a note. If you are looking for help performing the work described and you are in the San Francisco area, go to HPS Palo Alto Inc.and request a free evaluation.

As a reminder, it is unlawful to make copies including cut and paste or especially in the form of making printouts for reuse. If you wish to make a print for personal use, I will happily grant you one-time permission if you will kindly send me a request in writing.

Thanks again!